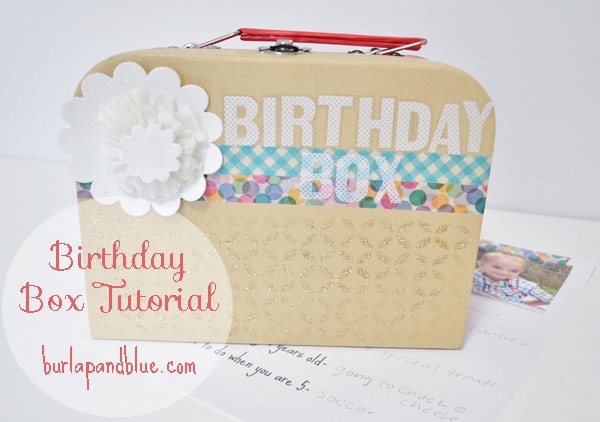
Both of my kids have Spring birthdays, so I thought this would be a great time to share a tutorial for a meaningful and fun project that will help your family make memories and connect for years to come. Each year, for each child, we fill out a simple questionnaire, attach a picture, and store it in the box for safekeeping.
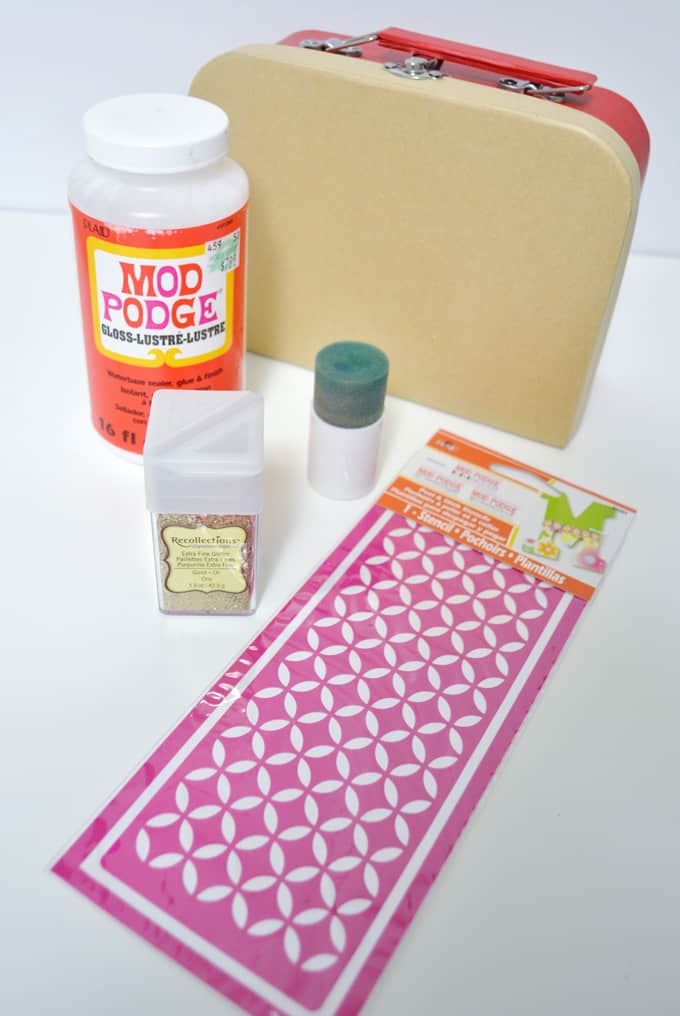
Materials:
Mod Podge
Mod Podge Rocks! Peel and Stick Stencil
foam brush
glitter
embellishments
questionnaire (see printable at end of post)
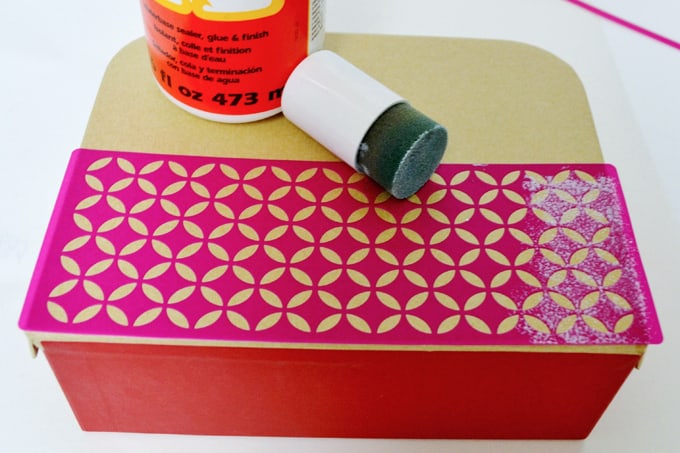
Step 1: This was my first time working with Amy’s line of Peel and Stick Stencils, and I was amazed at how easy they were to use! The best part? They clean easily and the adhesive will reactivate for up to 20 uses. This was my first, but definitely won’t be my last project with these stencils!
The first step is to remove the stencil from the backing, and place on surface. Use a spouncer to apply Mod Podge through cutout area of stencil.
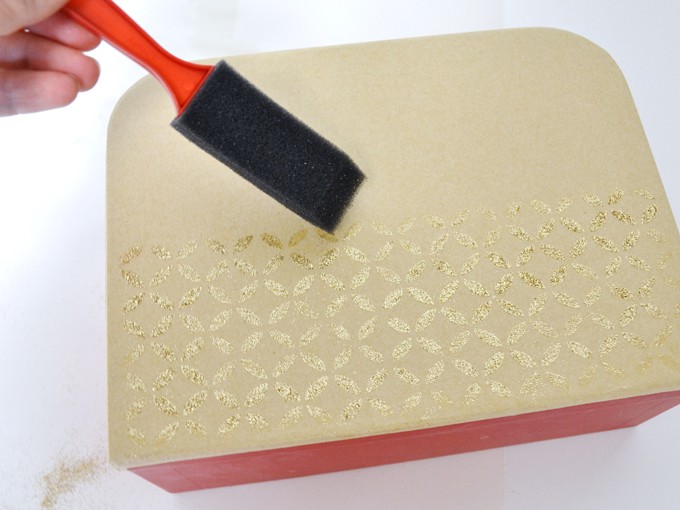
Step 2: Remove stencil, and apply glitter to Mod Podge. One thing to note: you need to get your surface glittered while the Mod Podge is still wet, and it can dry quickly, so you may need to work fast (which is also why I don’t have a picture of this step!)
Place stencil back on carrier sheet and wash. Allow Mod Podged area to dry completely, then use a small brush to remove any excess glitter from surface.
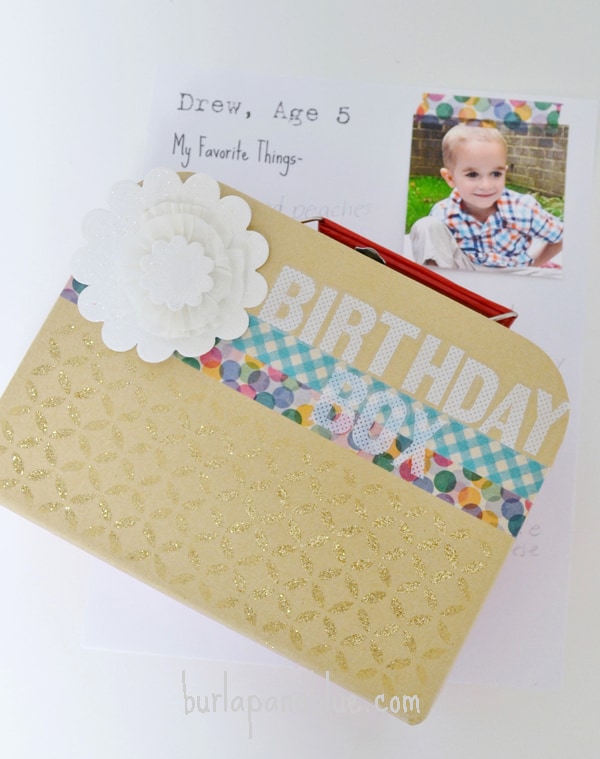
Step 3: Embellish box (I used a white scrapbooking embellishment, washi tape, and letter stickers), and you’re done!
Thanks for reading all about my birthday box tutorial! Have a crafty day!