If you know me at all, you know that I am a DIYer at heart. It follows, then, that I love DIY tools that are easy to use, multi-functional, and, most importantly, enhance and supplement my creative experience. Today, I am sharing a tutorial using one of my new favorite such tools-the Dremel® Micro™ 8050!
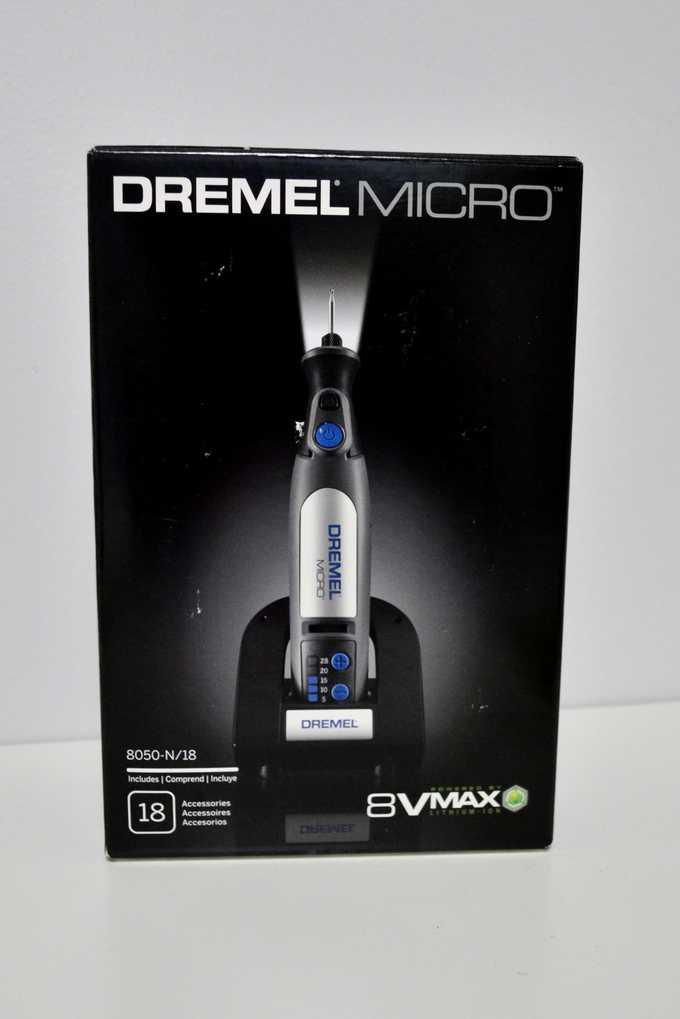
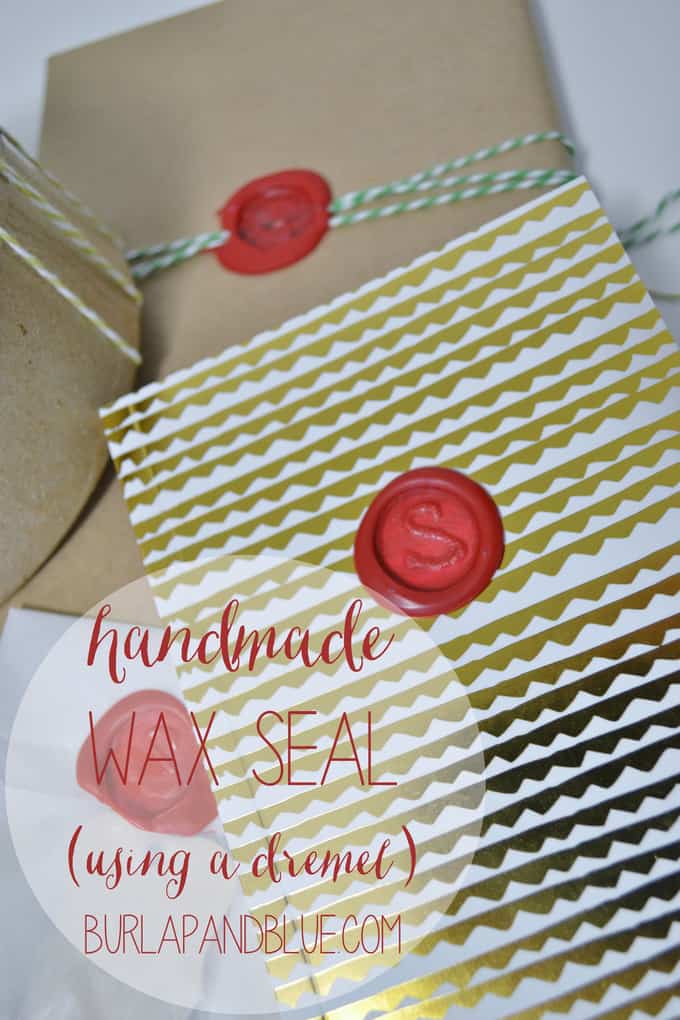
My husband and I created an easy and versatile wax seal using our Dremel® Micro™ 8050; it was the perfect weekend afternoon project, and will add dimension and a fun detail to my gift wrap, cards, and more! If you weren’t already aware, Dremel offers a full line of versatile tool systems that provide the perfect solution for almost any craft, hobby or DIY project.
The Micro 8050 is the most “brilliantly powerful” and precise cordless rotary tool that Dremel has ever produced. Light and easy to handle in tight spaces, the Dremel® Micro™8050 is packed with features that have crafters, hobbyists and DIYers in mind: soft grip, LED front-end lighting to illuminate projects, a docking station that continually charges, and an 8V Max Lithium-ion battery.
Want to create a wax seal of your own? Let’s get started!
Materials:
Dremel® Micro™ 8050
3/4″ wooden dowel
sealing wax
Here are the accessories I used to complete this project, all of which came with my Dremel Micro.
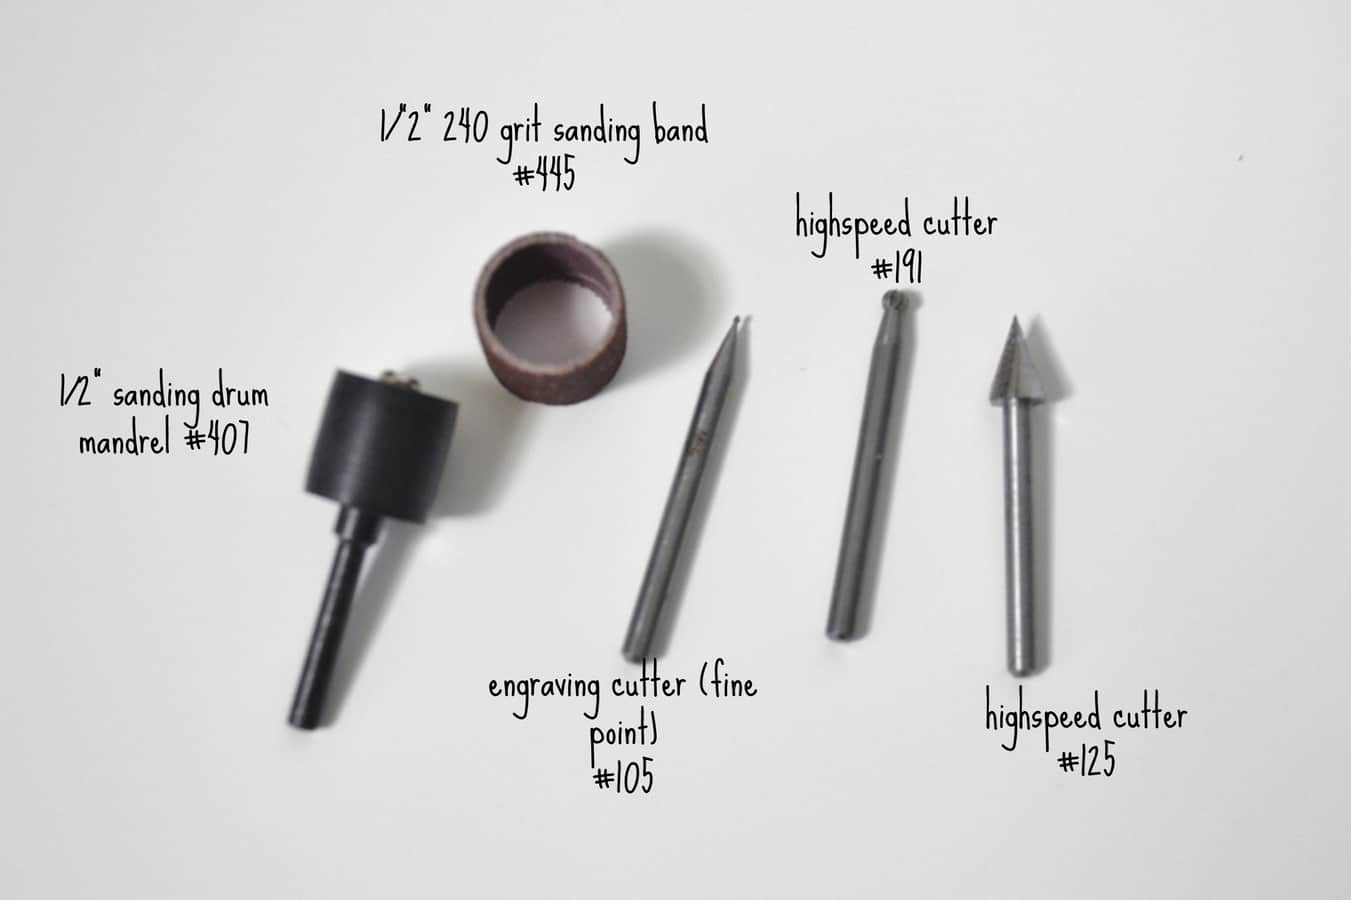
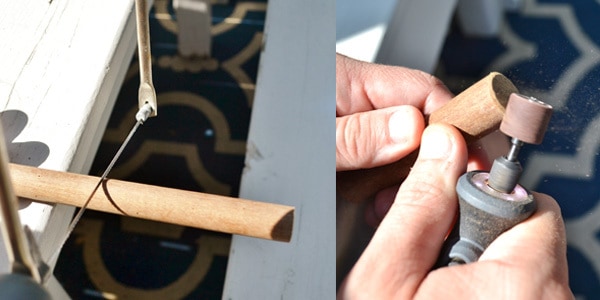
Step 1: Take your wooden dowel, and cut off a section approximately 4″ long. Using your Sanding Drum Mandrel and 240 Grit Sanding Band, smooth the edges of your cut dowel piece.
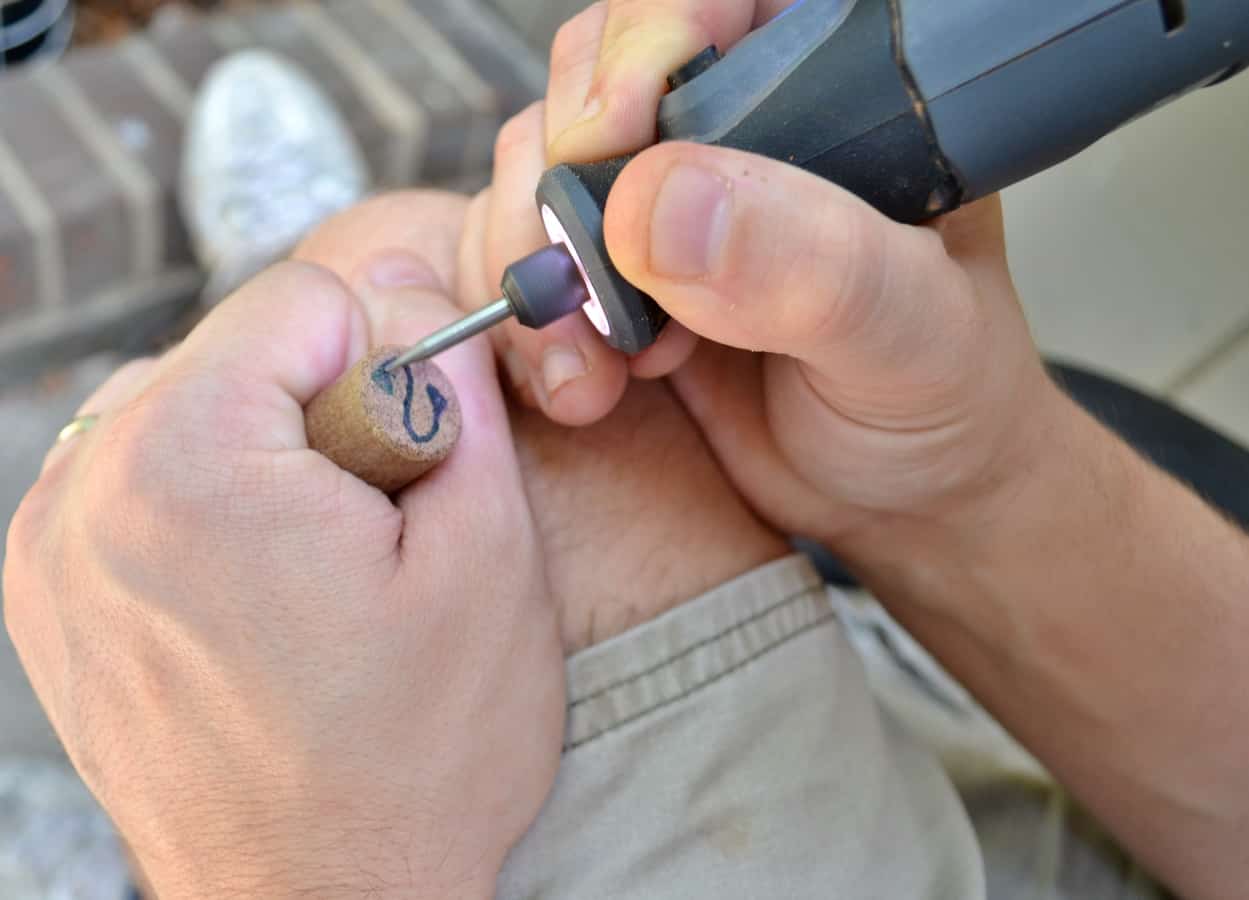
Step 2: Using a Sharpie marker, draw out the design you want on your seal on one end of the dowel. Make sure you draw your design/image in reverse. I used a pencil first, then traced over my pencil marks with the Sharpie.
Using your Highspeed Cutter (#191), carefully begin to carve out your design. We also used the Engraving Cutter (#105) and the Highspeed Cutter (#125) to help add the detailing and “finish” our design. This was an easy process, taking less than 5 minutes to complete.
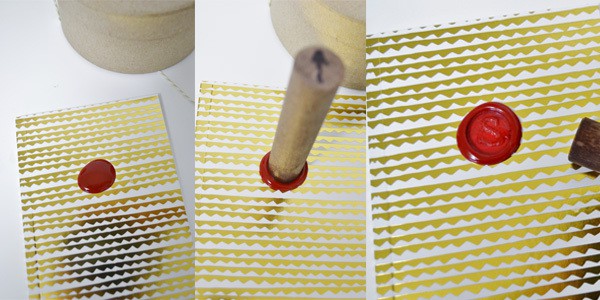
Step 3: Your stamp is done, now let’s start sealing! I used red sealing wax that conveniently fit inside my glue gun. Set your glue gun to “low”, insert your wax stick, and create a small puddle on your envelope, gift, etc. I used a journal and thought the seal added such a fun, personal touch!
Wet the end of your stamp (this prevents the wax from clogging up your stamp), shake off excess liquid, and insert stamp into your hot wax. My husband drew an arrow on our stamp so that we would remember which direction to hold the stamp (smart man)! Hold for a few seconds, then lift.
Be sure to practice first on a piece of paper or cardboard to get the technique down, but, seriously, it’s crazy simple. If you mess up, just wait for the wax to dry and simply pull the wax off and try again).
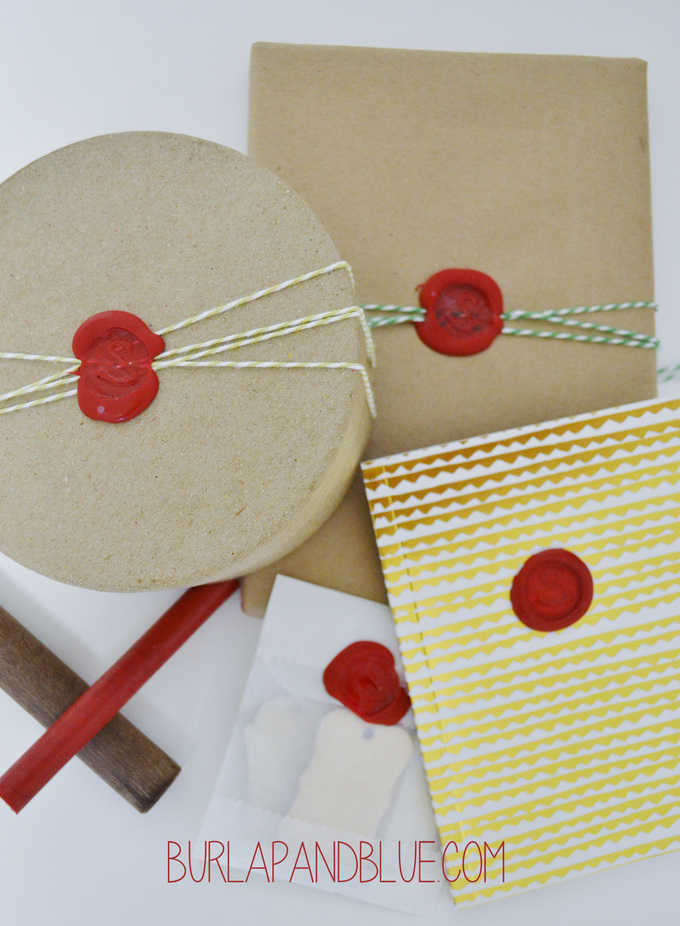
I love the idea of imprinting journals and glassine bags, but wouldn’t this also make a great way to decorate holiday packages? I’m envisioning kraft paper, bakers twine, and a wax seal to create fun, vintage-inspired gift wrap.
You can purchase the Micro 8050 online at Amazon.com and HomeDepot.com for $89 USD.
Do you own a Dremel Micro? I’d love to hear what your favorite use for this tool is!
Thanks for reading all about how to DIY a wax seal! Have a crafty day!
I was selected for this opportunity as a member of Clever Girls Collective and the content and opinions expressed here are all my own.
Claire W
Saturday 28th of October 2023
The arrow is clever, I agree. But have you ever noticed the vintage wooden stamps from the times they were used every day in offices? They have a nail/stud on the handle, it indicates the bottom of the stamp, so you can even feel that you are using it the right wat up.
Joseph Hicks
Monday 10th of October 2022
I have used Dremel tools since 1965; everything from gun repair to carving monkeys from peach pits! Try it! The tools just keep getting better
Niki meiners
Thursday 23rd of October 2014
That is one versatile tool that is now on my Christmas list.
Cristin @ Pampered Teacher
Thursday 23rd of October 2014
OMG, I love this project. I got a Dremel for Christmas last year and this is exactly the kind of project I love to do!!
Vidya Sudarsan
Tuesday 9th of September 2014
Neat! What a nice way to personalize gifts!