This post is special to me, y’all. It’s my very first contributor post for Mod Podge Rocks, from about this time last year.
Can’t believe I’ve been contributing to the lovely Amy’s blog for a year now–it’s been such fun and a great way for me to flex my creative muscles, so to speak. Enjoy!
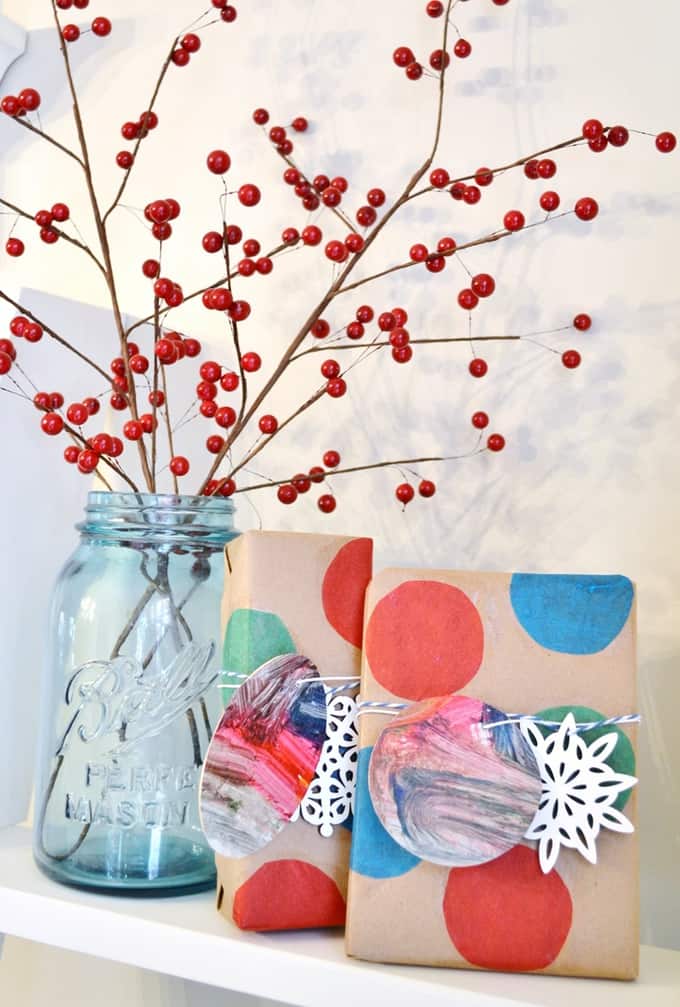
The inspiration for this project came from my son’s fingerpainting projects and my love of polka dots.
I love that the gift tags incorporate his art, and I adore the colorful, graphic feel of the wrapping paper! Want to make some of your own? Let’s get started…
Materials:
mod podge
tissue paper
kraft paper
gift tags (either wooden or paper)
artwork (either your child’s or your own!)
string or twine for hanging
scissors
Step 1: Gather your materials. Take your gifts and wrap them in kraft paper.
Step 2: To create your gift tags, just trace your blank tags onto your artwork. Cut out, and mod podge onto your tags. I added one coat of sealer, but you can add more if you’d like!
Step 3: Layer your tissue paper, trace a circle, and cut out.
I used a vitamin bottle lid to create my circles, but use whatever you can get your hands on! A craft punch would make this step easy-peasy. For a bit more variety, use circles of different sizes!
After your circles are cut, simple mod podge them onto your wrapped gifts. Depending on your color choices, and how far apart you place your circles, you really can get different looks!
Step 4: Wait for everything to dry, tie your tags onto your gifts, and embellish as much (or as little) as your heart desires.
I used simple wooden snowflakes I found at Crate & Barrel a couple of years ago, but a sprig of holly, a jingle bell, or mini ornament would look great as well!