This post first appeared on Beginner Sewing Projects, and site filled with quick and easy sewing projects anyone can make. From home décor to selfish sewing to ideas for living a zero waste lifestyle, you are sure to find a fun project to make, complete with step-by-step instructions and photos to follow. While the projects are perfect for beginners, those with advanced sewing skills love to make them too!
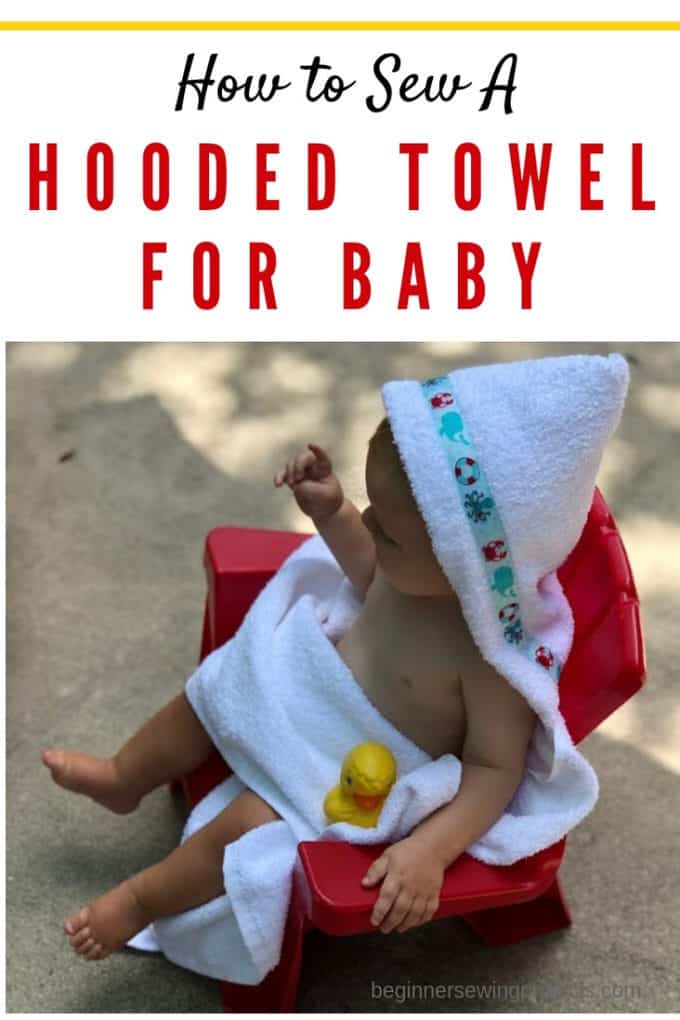
A hooded towel keeps baby warm and dry, and it is super easy to sew! Follow this step by step tutorial with photos to make one for all the babies you know.
This poncho style grows a bit with the baby, so they can enjoy it for a long time. Use it after bath time, at the pool, and at the beach or lake too.
This is a fantastic project for a baby shower gift. Towels and ribbon can be purchased in a ton of colors and patterns to customize the look for gender or theme.
You might want to make more than one, so there is a backup when the other hooded towel is wet. Babies love the water!
Supplies to Make a Hooded Towel for Baby
- Hand Towel
- Bath Towel
- Decorative Ribbon
- Scissors
- Rotary Cutter
- Cutting Mat
- Pins
- Thread
- Sewing Machine
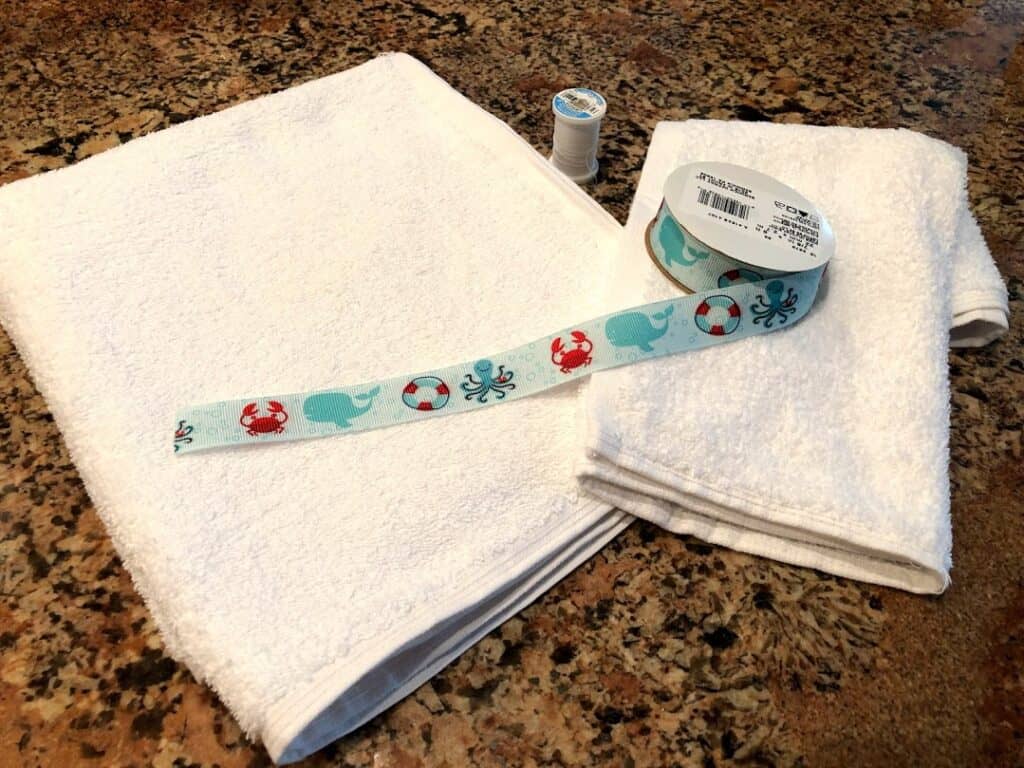
Towels come in a variety of colors. Choose the same color bath towel and hand towel, or have fun mixing and matching. Be sure to use a hand towel rather than a wash cloth.
Ribbon is also available in lots of colors and designs. Give multiple hooded towels different ribbons for multiple children. Then everyone will know which one belongs to them.
How do you Make a Hooded Towel for Baby?
Keep reading for the full guide to creating your own hooded towel.
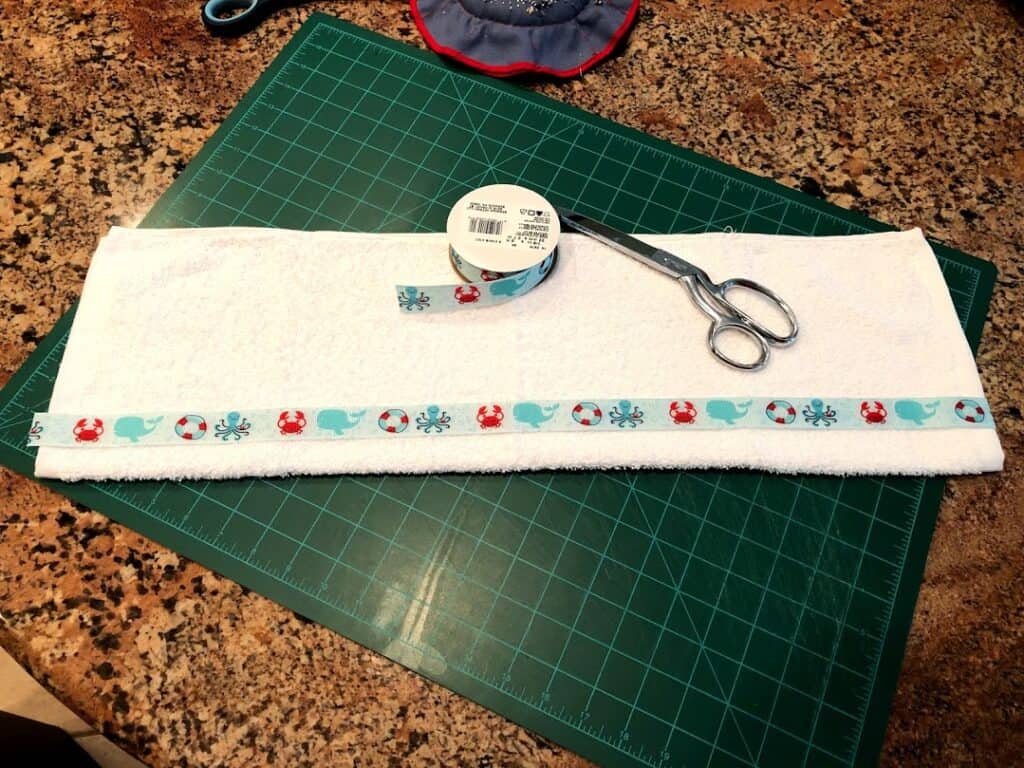
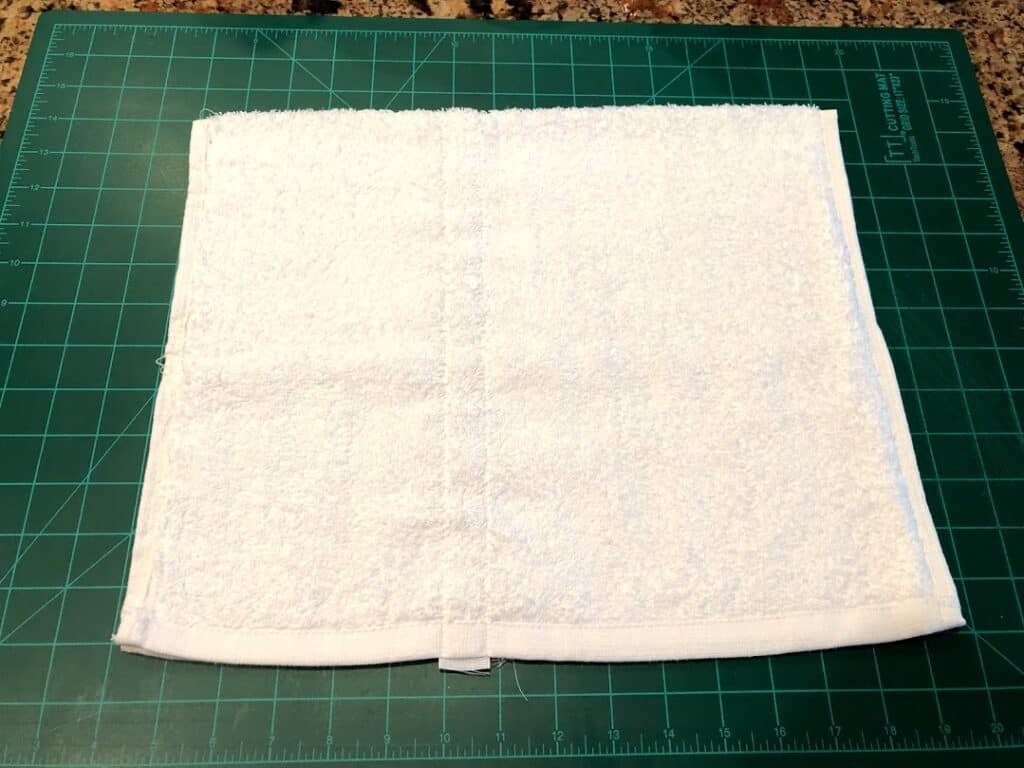
To begin, fold the hand towel lengthwise with the long side touching the other long side.
Measure and cut a piece of ribbon just longer than the longest side of the hand towel.
Lay the ribbon about an inch away from the folded edge of the hand towel. Pin the ribbon to the top layer of the towel only.
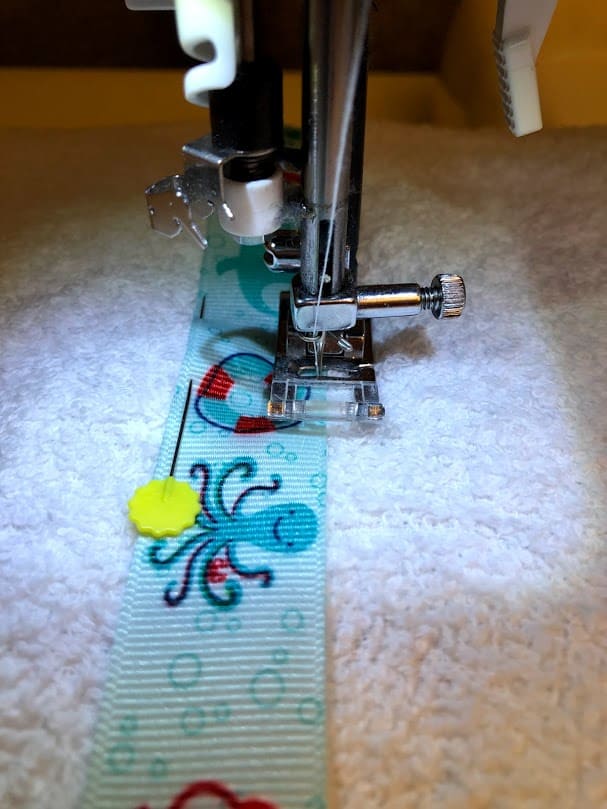
Next unfold the hand towel, and sew the ribbon to the towel. Stitch along both sides of the ribbon, staying as close to the edge as possible.
Now fold the hand towel the opposite way with short sides touching and the ribbon on the inside.
Pin the long sides together, and stitch about 1/4″ away from the finished edge of the towel.
You should now have a pocket with the opening where the short sides touch each other.
Using your rotary cutter and cutting mat (or scissors), trim off the finished edges along the sides of the pocket you just created.
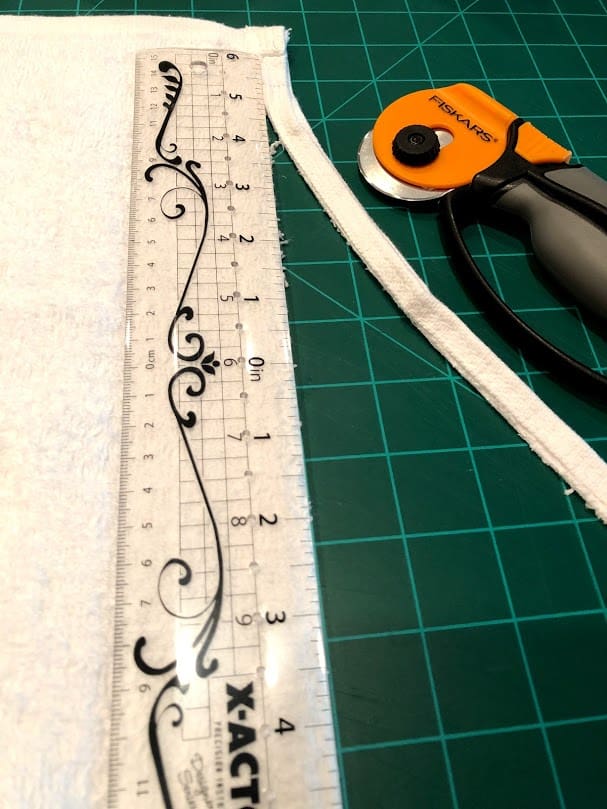
This will cut down on the amount of fabric you have to sew through later, as well as allow the hood to lay flatter. Be sure not to cut through your stitches!
Next turn the pocket right side out (ribbon facing out). Straighten and smooth the towel.
Now fold corner 1 inside corner 2.
Turn and refold the towel where seams are in the center. Fold the top down into a triangle.
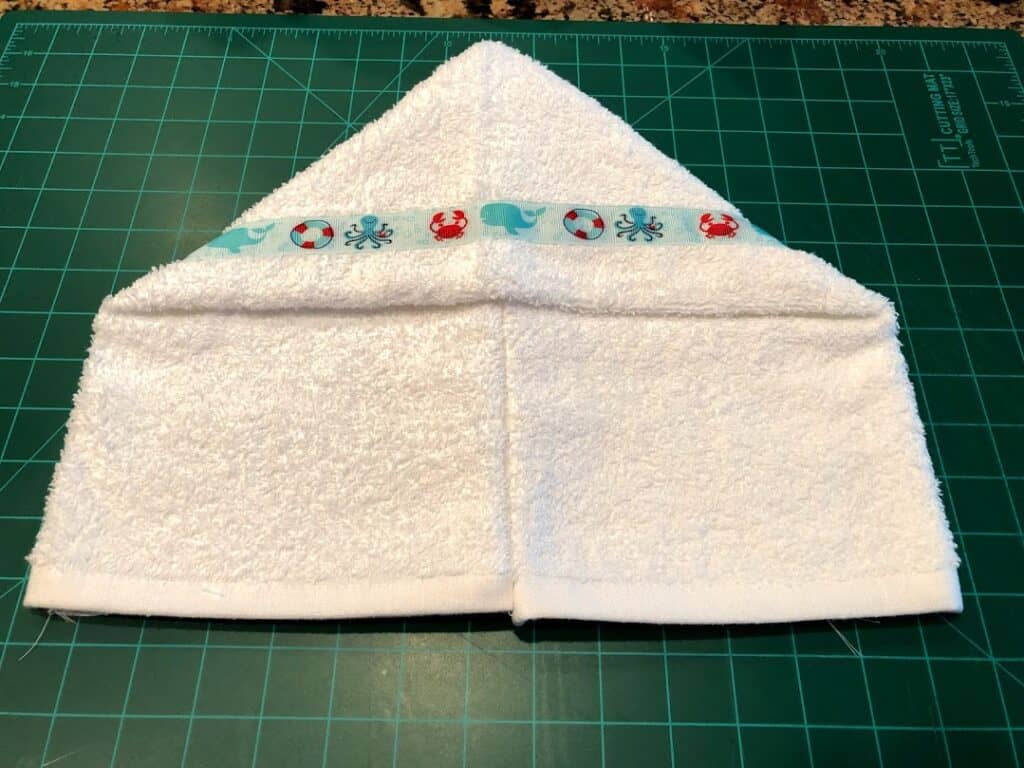
This creates the hood shape.
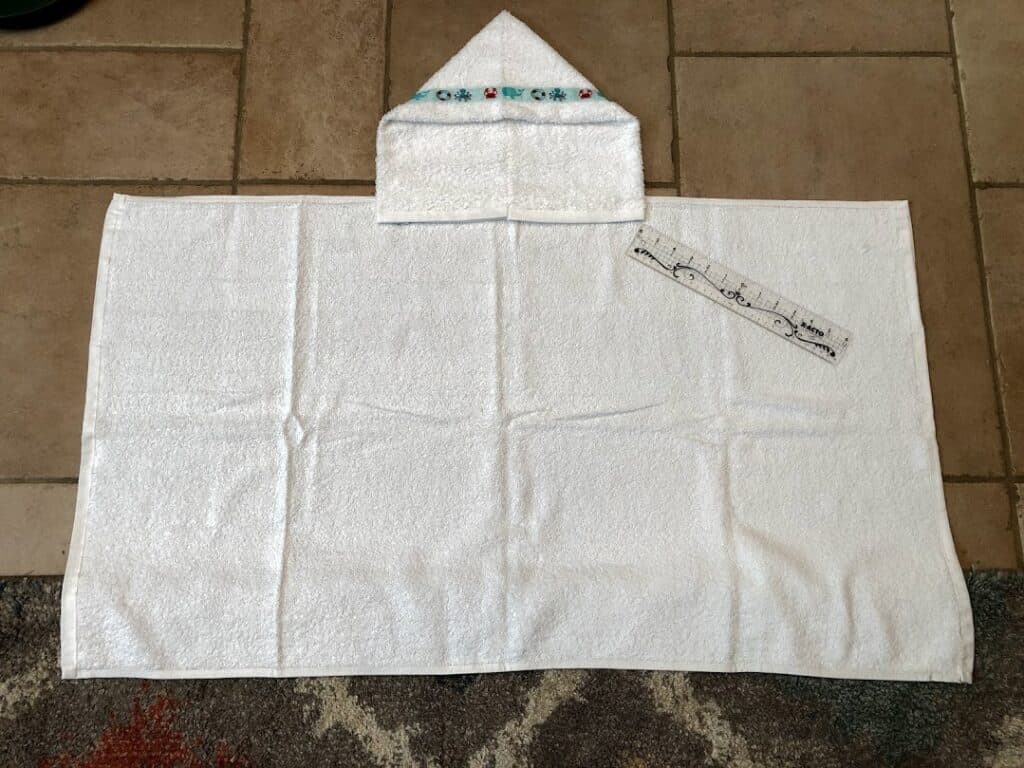
Next find the center of the bath towel. Lay the hood on top of the bath towel, overlapping by about 1.5″.
Pin the hood onto the bath towel.
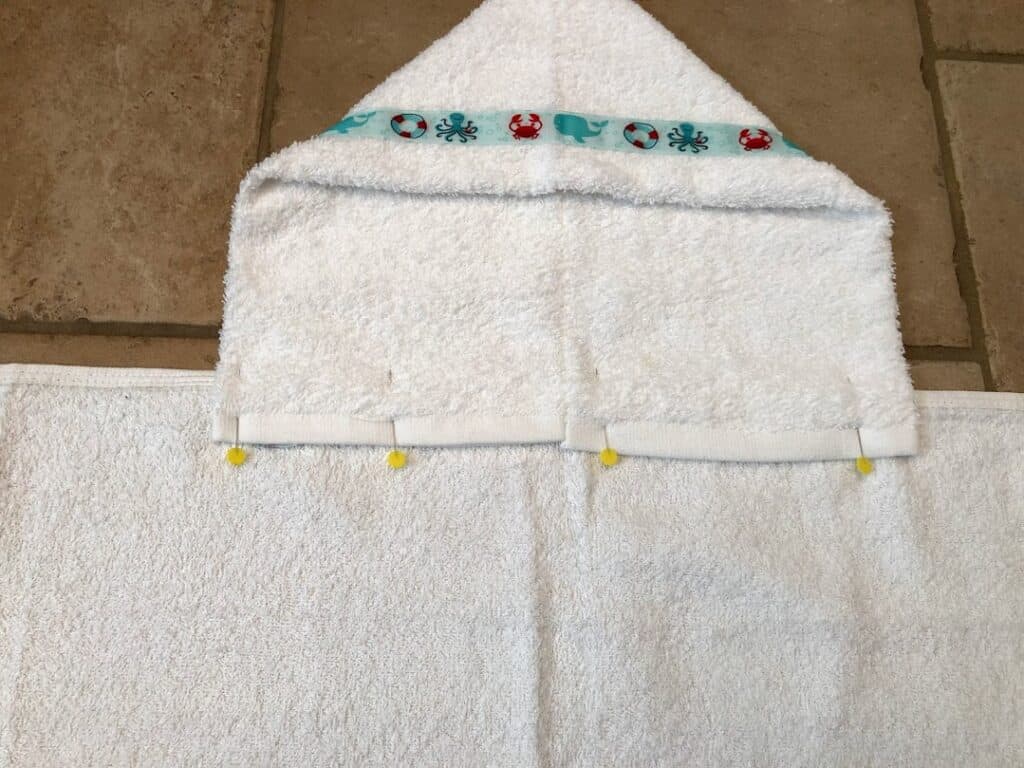
Now sew along the bottom edge of the hood finished seams with 1/4″ seam allowance on the LEFT side of the seams.
The hood should be to the right of your needle.
Then flip the towel over, and pin the bath towel flap to the hood.
Sew with a zig zag stitch and 1/4″ seam allowance for a maximum strength hold. Backstitch several times on each end to reinforce the seam.
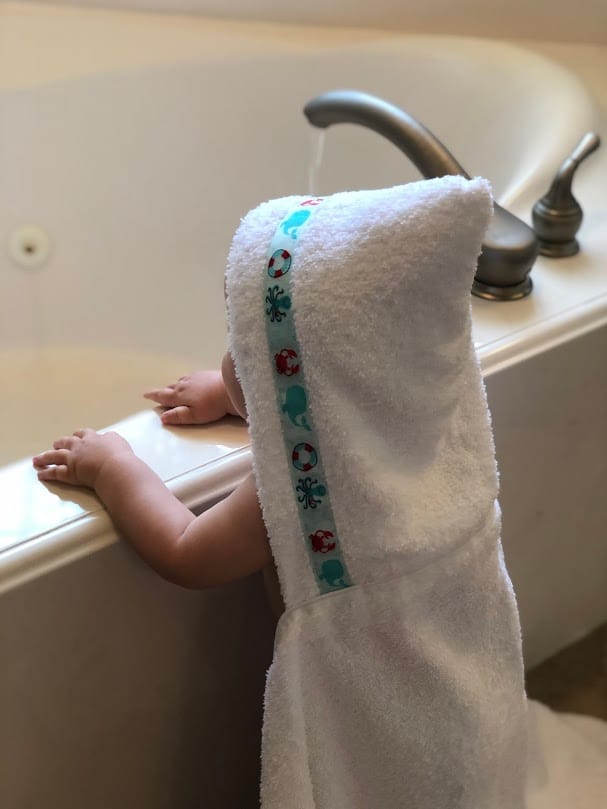
Now find a cute baby, and wrap that bundle of sweetness in their new hooded towel!