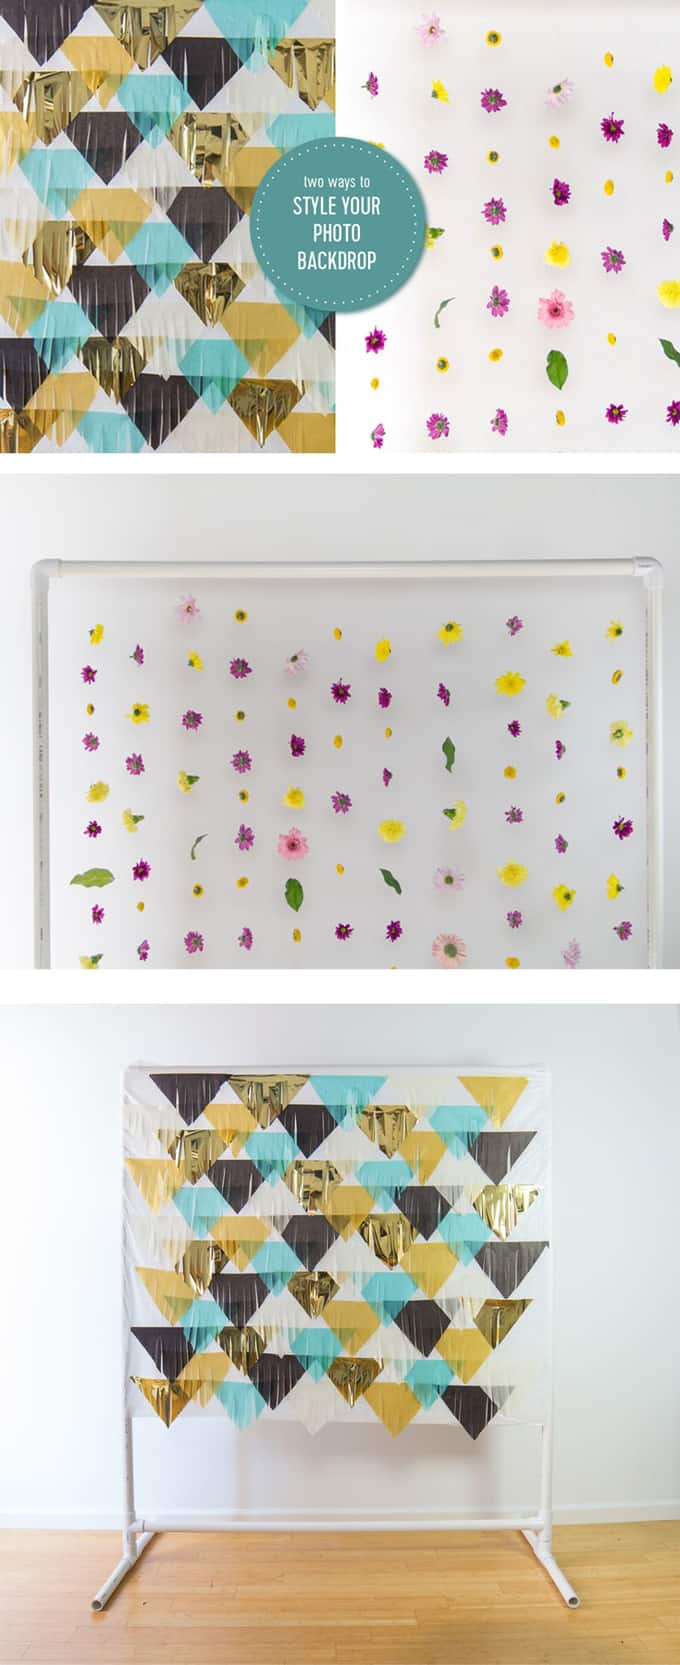
How to make two DIY Party Backdrops–perfect for your next party or get together! This post includes a tissue paper fringe backdrop and a flower backdrop!
If you’ve been to a party recently, you might have snapped a photo in front of a fun photo backdrop. These photo backdrops are great for not only making memories but also for giving your guests a fun activity to participate in!
With tons of props and creative, goofy poses, having a photo backdrop at your party is a guaranteed way to not only have a good time, but also make some memories while you’re at it!
However, often these photo backdrops can get expensive. Luckily, these backdrops are relatively easy to create yourself. Using this tutorial you can learn how to create both a flower backdrop and a flag one, so you can cater your photo backdrop to your party’s theme.
The best part? Once you’ve created the backdrop stand, you don’t need to recreate every time you have a party! Just swap out the style of the backdrop and voila! You have a new, easy backdrop for people to pose in front of.
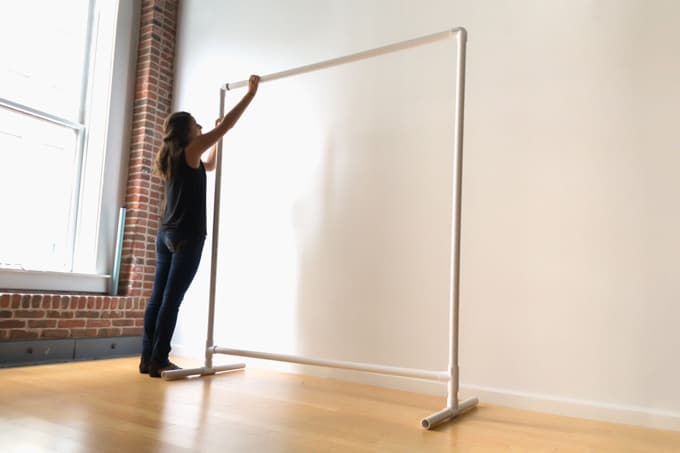
How to Make the Backdrop Stand
As mentioned, the backdrop stand can be repurposed for future parties over and over again. All you need are a few items from your local hardware store to get started!
Materials Needed
Though we used a 1/25 inch PVC pipeline, use whatever size you prefer!
- 4 – T connectors
- 2 – elbow connectors
- 4 – 1.5 foot long pieces
- 2 – 4 inch long pieces
- 2 – 5 foot long pieces
- 2 – 6.5 foot long pieces
Be sure to give these dimensions to your hardware store, as they will cut it for you!
Directions
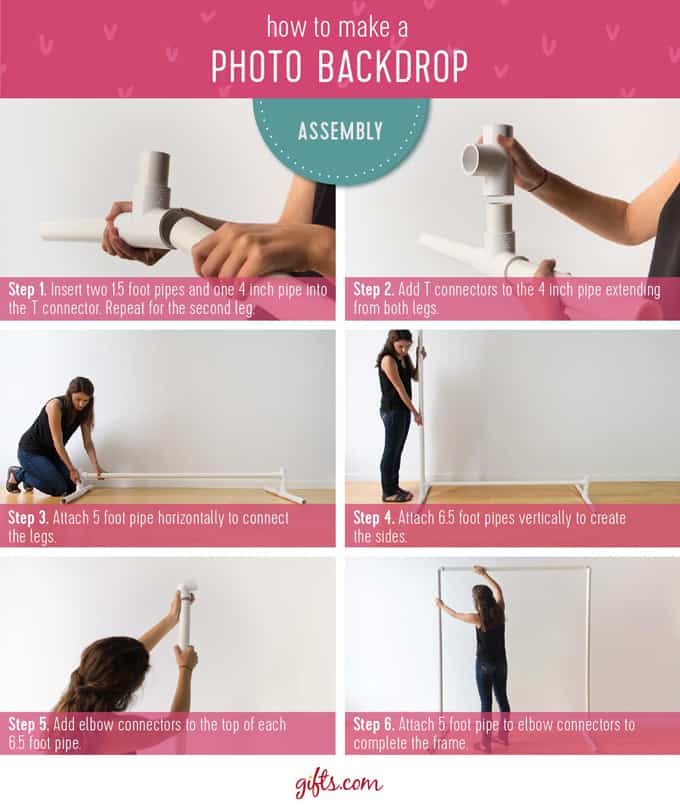
Step 1: Begin by building the legs of the stand. Insert a 4 inch pipe in the middle of the T connector and two 1.5 foot pieces on the sides. Repeat for the second leg. If you want, add caps to the legs.
Step 2: Add another “T” connector to top of the 4 inch pipes.The middle “T” line should be facing inwards.
Step 3: Connect the two base pieces by attaching a 5 foot pipe to each of the “T” connectors that are facing inwards.
Step 4: Add the sides of the photo backdrop by attaching the two 6.5 foot pipes to the upward facing openings on the “T” connectors.
Step 5: Add the two elbow connectors to the tops of the 6.5 foot pipes.
Step 6: Connect across by attaching the remaining 5 foot pipe to the elbow connectors.
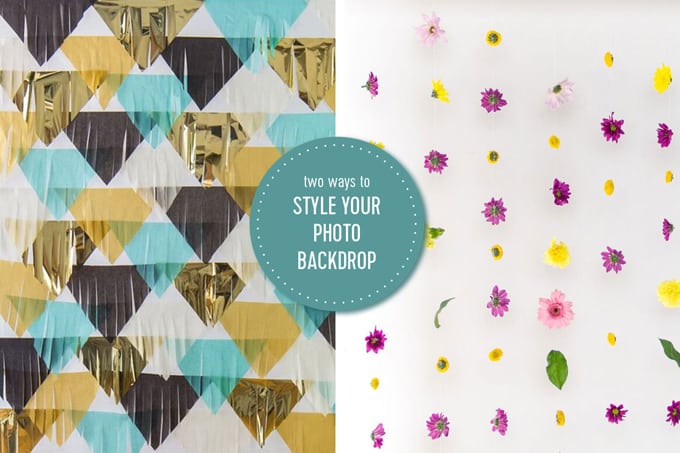
Fringe Photo Backdrop
A fringe photo backdrop makes for a perfect photo opportunity for a New Year’s party or birthday!
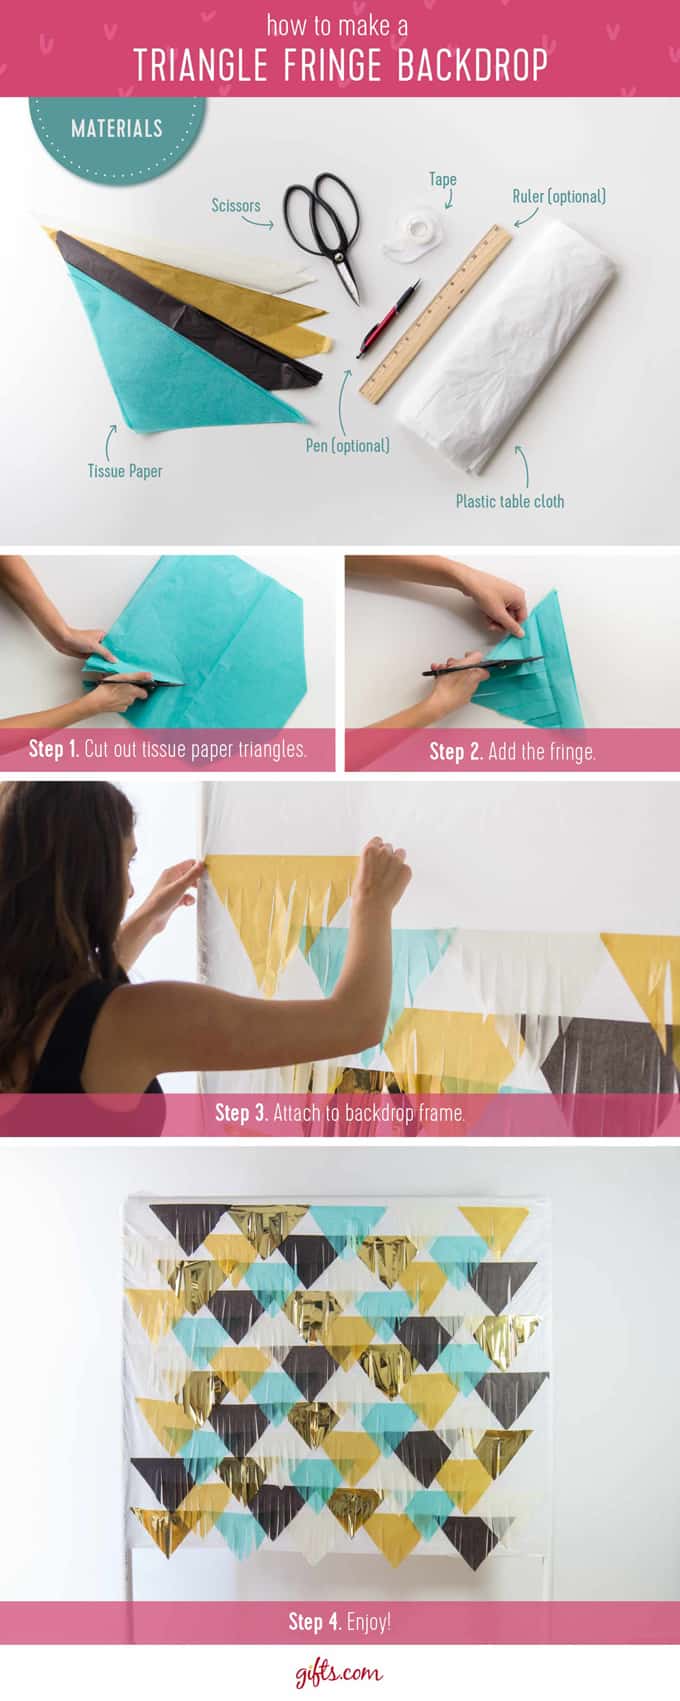
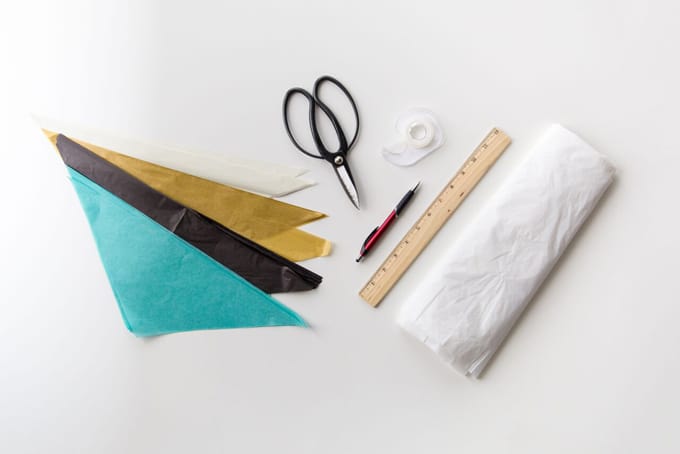
Materials Needed
- Tissue paper
- Scissors
- Tape
- Plastic table cloth
- Ruler
- Pencil
Directions
Step 1: Cut out the tissue paper triangles. To speed up the process, cut through multiple layers at the same time.
Step 2: Cut out the fringe by making vertical cuts into the paper.
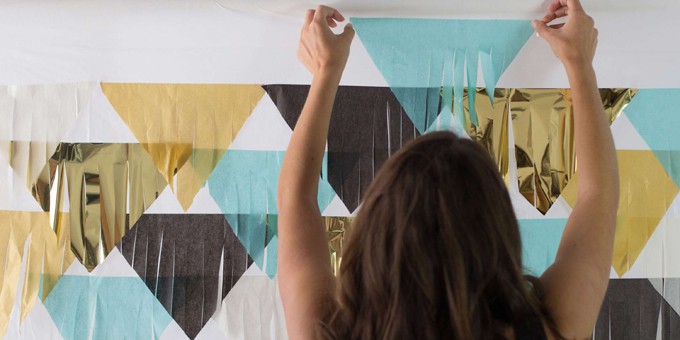
Step 3: Attach to backdrop frame with tape.
Step 4: Print out photo props and enjoy!
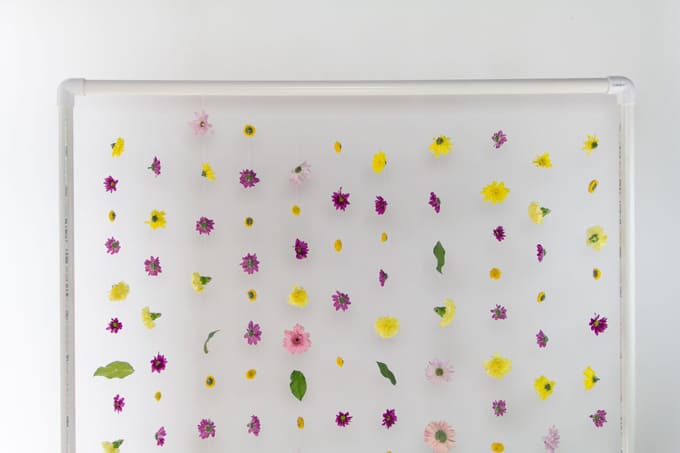
Flower Photo Backdrop
For a more feminine option, you can also make a flower photo backdrop. It’s great for bridal showers and wedding receptions!

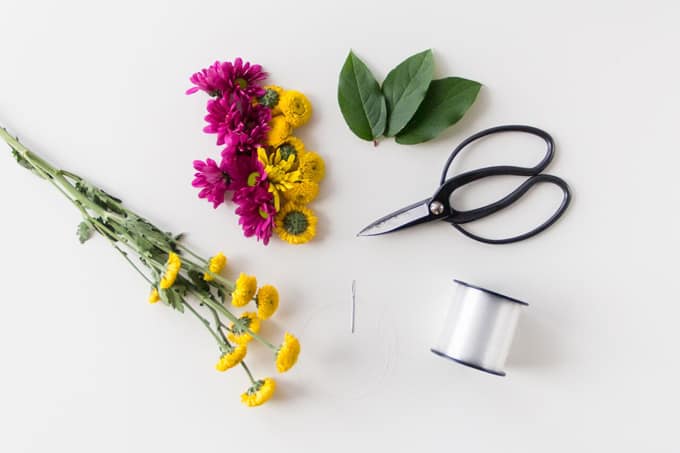
Materials Needed
-
- Flowers and leaves
- Fishing line
- Thread
- Scissors
Directions
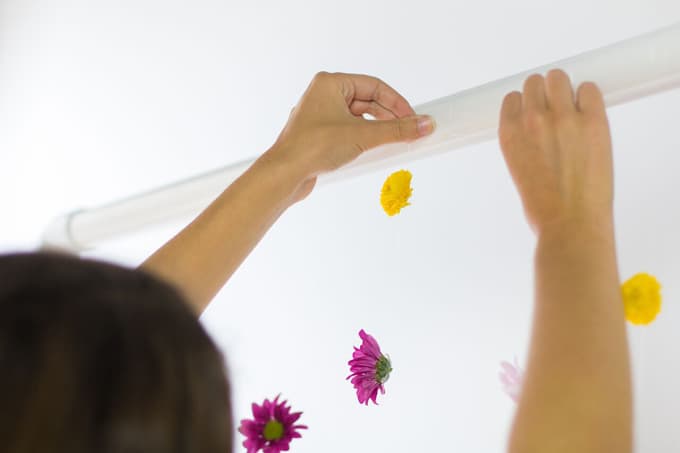
Step 1: Attach flowers to the fishing line, tying off the end so that the flowers won’t slip off.
Step 2: Hang flowers on backdrop frame with a basic knot.
Now that you know how to create two party backdrops, you can easily switch out the colors and items to mix and match for the occasion.
Cut out different shapes or try new flowers to add some variety and get a TON of use out of your new photo backdrop—and even more memories!
Want more photo backdrop inspiration?
Learn how to make a tissue paper backdrop here
Learn how to make a paper plate backdrop here
Make Giant Paper Flowers for another gorgeous backdrop idea
Thanks for reading all about Party Backdrops {How to Make Two DIY Photo Backdrops}. Have a fantastic day!
Remona
Friday 3rd of November 2017
Wonderful! Looking so nice! Thanks!