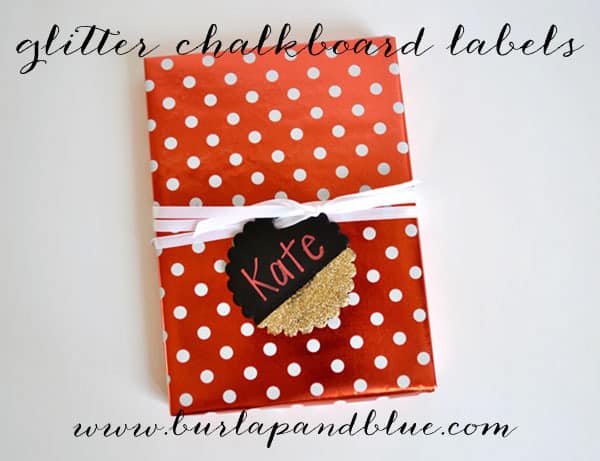
If you’re anything like me, you are always on the lookout for easy and creative ways to gussy up your gifts.
When I ran across these scalloped, chalkboard tags at the craft store the other day, I immediately fell in love, and knew that the addition of some gold glitter would take them to a whole new level of fabulousness.
The how-to is so simple, anyone can make these. Let’s get started…
Materials:
wooden, chalkboard gift tags
Mod Podge
painters tape
glitter
foam brush
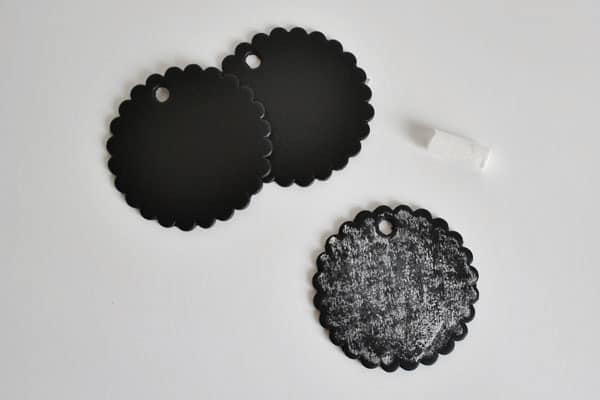
Step 1: If you can’t find chalkboard tags, just take plain wooden tags and coat them with chalkboard spray paint.
First, take your tags and prime them-this is a must before writing on any chalkboard surface. Just take a piece of chalk, and rub the side of it onto your tag. Erase with a paper towel or sponge, and your chalkboard surface is ready!
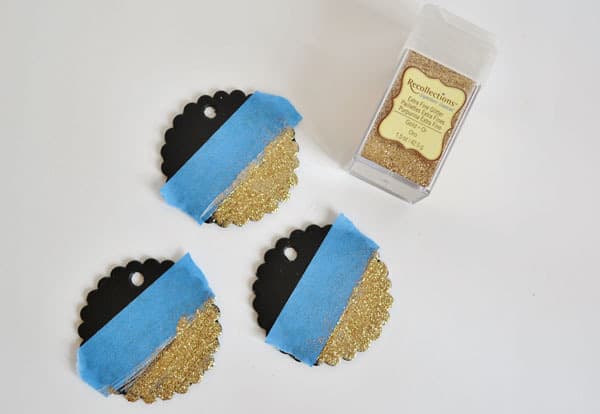
Step 2: Take painters tape and mark off the area where you want to add the glitter. Apply a coat of Mod Podge, and add your glitter.
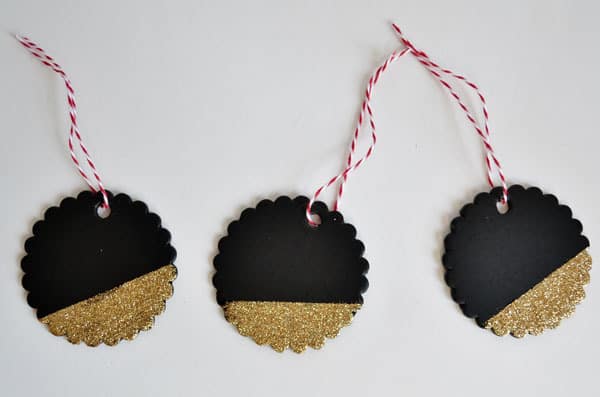
Step 3: Remove the tape, let dry, and you’re done!
Glitter really does make everything better, doesn’t it?
Thanks for reading all about my glitter chalkboard labels! Have a crafty day!