Wallpaper brings a different aura to the walls of a house. It often reflects a bold, colorful-patterned, or subtle neutral vibe while maintaining a stunning finish to the walls of any room.
Wallpaper usually comes in a variety of colors, patterns, and textures; it is up to you to decide which sort of wallpaper suits your requirements the best.
Choosing the ideal wallpaper for your home can be a bit difficult at times, but with the right help, you can choose from a wide range of styles and get the perfect wallpaper to enhance the ambience of your home.
In this article, we’ll be discussing some pro tips and tricks that will help you put up wallpaper in your home with relative ease.
Simple Ways to Hang Wallpaper in Your Home
Hanging wallpaper is actually not as complicated as many new DIY workers make it out to be. It has become relatively easy to hang wallpaper these days, thanks to newer and simpler techniques like pasting on the wall, applying wall primer, and more.
The first step in hanging the ideal wallpaper in your home is to choose the right tools and adhesives. But most of the time, new DIY workers struggle with choosing adhesive properly and end up ruining the wallpaper. There are a few approaches to get the most effective results at hanging wallpaper.
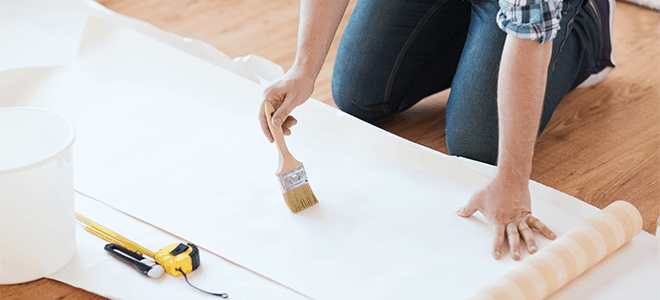
Get the Right Wallpapering Tools
Before starting your DIY project, you need to gather up all the essential tools that will aid you in finishing your work quickly and efficiently. It is very common to make certain mistakes on your first take at this, but it is vital to choose the right tools for completing each set of tasks.
With the proper tools and some practice, anyone can master hanging wallpaper the right way. The essential tools needed for wallpapering are:
- wallpaper primer
- pencil/marker
- paint tray
- wallpaper paste/glue
- scissors/utility knife
- tape measure
- sponge
- taping knife
- clean rags
- plastic smoother (8–inch)
- seam roller
- ladder
- angled paint brush (11/2–inch)
- razors/single–edge blades
- wide scraper (10–inch)
Get Done with Prep Work
It is pivotal for all DIY workers to see if there are any related tasks left to do and if the walls are fully ready before hanging wallpaper. You should see if there’s any existing wallpaper on the wall, if the walls are freshly plastered, if the walls are lined with lining paper, and if there are any fixings on the walls before applying the strip.
Removing any existing wallpaper will provide a smooth finish and reduce the chances of air bubbles and creases. Lining paper prevents the newly hung wallpaper from shrinking and also hides any existing stains or fixings. Wall sealer seals the surface of the walls and helps spread the wallpaper paste.
Determine the Number of Rolls
Wallpaper usually comes in a wide range of sizes. Selecting the right number of wallpaper rolls needed for your project is crucial for getting the job done smoothly without any errors. It is wise to buy more than the required amount of papers just to be safe.
You can calculate approximately how many rolls you are going to need per room by dividing the total square ft. of the walls (windows and doors included) by the square footage of a roll. It is better to buy at least 5-10% more wallpaper to compensate for any possible errors.
Take Proper Measurements
It is almost impossible for anyone to hang wallpaper appropriately without taking proper measurements of the room first. You have to be very careful while taking the measurements because if you cut the wallpaper in the wrong way, there’s no going back.
It is wise to take measurements 2 or 3 times appropriately before cutting the wallpaper. Take proper measurements of the wall that you chose to hang the wallpaper on, then add 20 cm to it (to compensate for any errors).
Normally, wallpapers do not always fit the walls perfectly, even when you hang the last strip with the first one, So don’t expect to have a perfect match and be ready to cover up any mismatch.
Apply the First Strip
After taking proper measurements, apply the adhesive strip and hang the wallpaper on the wall. There are two ways to go about this: pasting it on the wall and pasting it on the wallpaper. It is much more convenient and effective to paste the adhesive layer on the wall than on the wallpaper.
Pasting a small piece of paper on the top corners of the wall makes it easier to attach the wallpaper. Applying the adhesive strip on the wall and gently smoothing it down also works like a charm.
Remove Excess Paper
After you are done with applying the first adhesive layer to hang the wallpaper, cut away the excess paper with a ruler and a utility knife. It is important that you be very cautious when handling excess paper; you don’t want to cut off too much or too little.
Getting the exact measurements and trimming all excess paper accordingly will result in proper fitting of the wallpaper. It usually gets tricky to remove excess paper around the top corners and the ceiling. So, using an angled paint brush and a utility knife, smooth out the surface and cut down the corner of the paper.
Match Up the Pattern
You need to apply the second strip after trimming any excess paper from the first strip. Applying the second strip is a bit harder than the first since you just can’t measure and put it up on the wall. It depends largely on the type of wallpaper and its pattern if you will get a smooth transition or not.
It is wise to focus on matching the patterns and meeting the edge of the first strip when applying the second strip. Overlapping wallpapers will create a break in the pattern and make your paper look raised.
If there is any excess paper at the top of the ceiling, make sure to mark and trim it later. When applying the second strip, keep in mind that it should account for the length of the wall, the excess at the top of the ceiling, and an extra 10 cm at the bottom.
Sort Out the Corners & Tricky Areas
Corners are the trickiest areas that trouble new DIY workers. An easy solution to this problem is pasting on the wall in hand at first, then moving the second part of the paper onto the next wall.
While working with tricky areas like light switches and sockets, apply your wallpaper strip as before, then cut off excess paper on top of the switches using scissors. Finally, smooth out the edges around the switch box.
Conclusion
Hanging wallpaper in your home is easy once you get the hang of it. It hardly matters if you are an experienced DIY worker or not as long as you’re being smart and following the aforementioned guidelines.
So, what’s the hold up? Get to work and remember to cut, glue, paste, and repeat! Bring out the true essence of your home through hanging the wallpaper of your choice and giving it the elegant look it deserves.