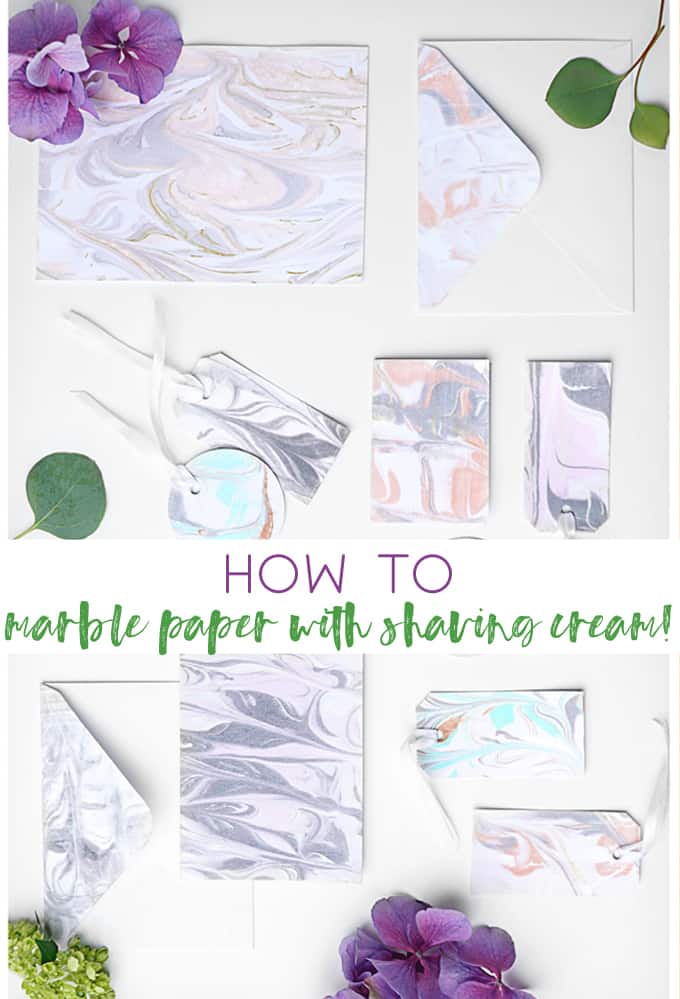
Sharing an easy marble paper DIY using shaving cream! Use this technique to make note cards, place cards, gift tags, and more!
Marble is a trend that can be seen everywhere, from weddings to home decor, even kids craft with these marbled shaving cream hearts!
It’s also a style that is easy to recreate yourself. Looking for a unique way to transform your next dinner party?
Want to take your gift giving to the next level?
Marble paper is a fun and easy DIY that will allow you to personalize any craft.
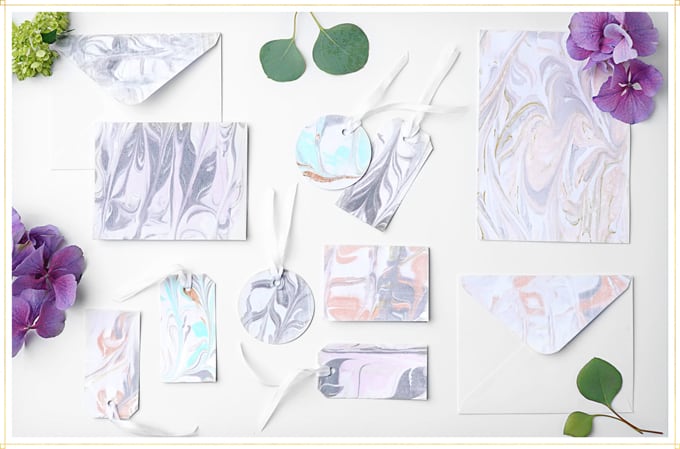
Not only is the marble look is elegant, but it can be adjusted to fit any color scheme, depending on what you want to create.
Whether you want to match place cards to your dinnerware or create gift tags to match the holiday, this technique will work.
To help you get started, FTD walks you through how to marble paper in 7 easy steps, and we’re also sharing the full tutorial below! Once you understand the process you can personalize the look by creating designs with your favorite colors.
If you aren’t sure which colors to start with, we’ve included marbled paper inspiration so you can mimic the look!
Materials:
Baking sheet
Shaving cream (must be foam not gel)
Watercolors and acrylic paint
Cardstock
Paintbrush
Dropper
Scraper (paint scraper, ruler or any flat edge)
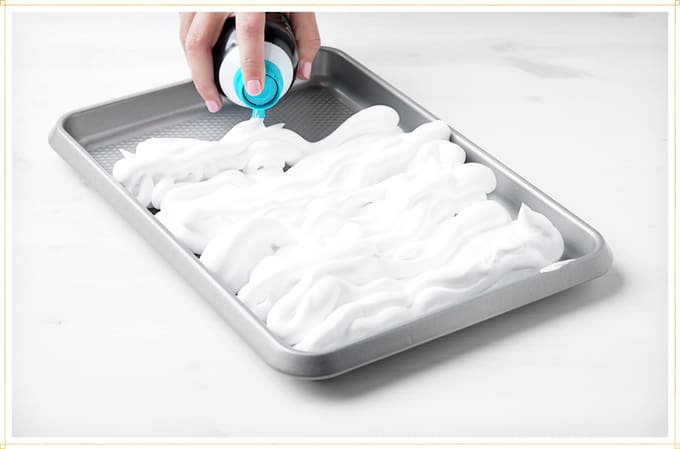
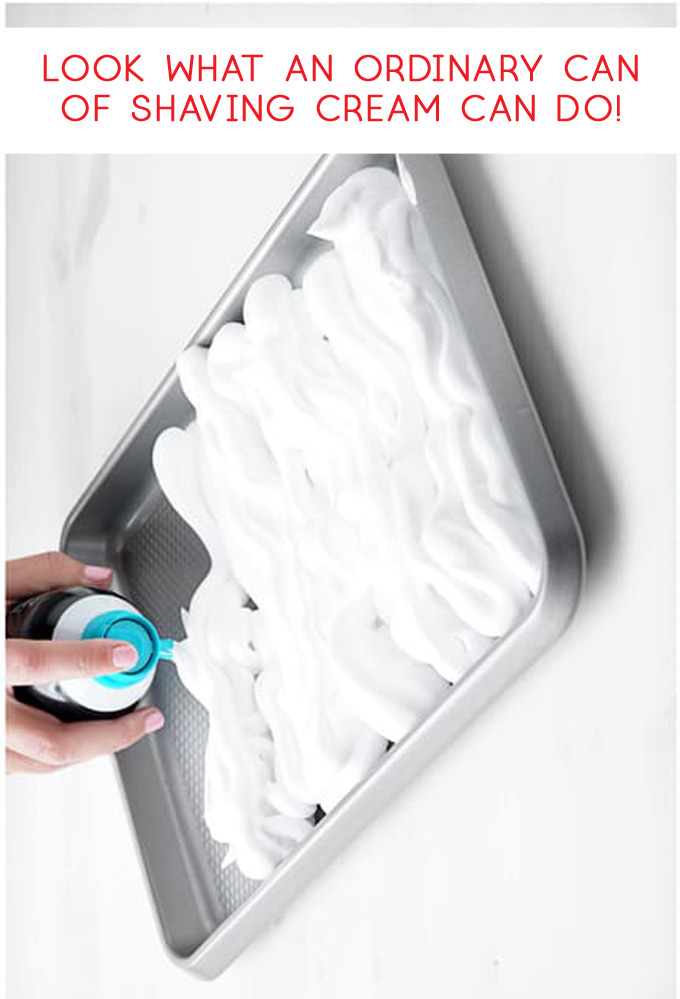
Step 1: Fill the baking sheet with shaving cream.
Fill a portion of the baking sheet with shaving cream foam. The area you fill should be a little larger than the size of the paper you are marbling. Make sure you use a shaving cream that foams; don’t use a gel or lotion.
Step 2: Smooth out the surface of the shaving cream.
Use the scraper to smooth out the shaving cream so that it has an even surface.
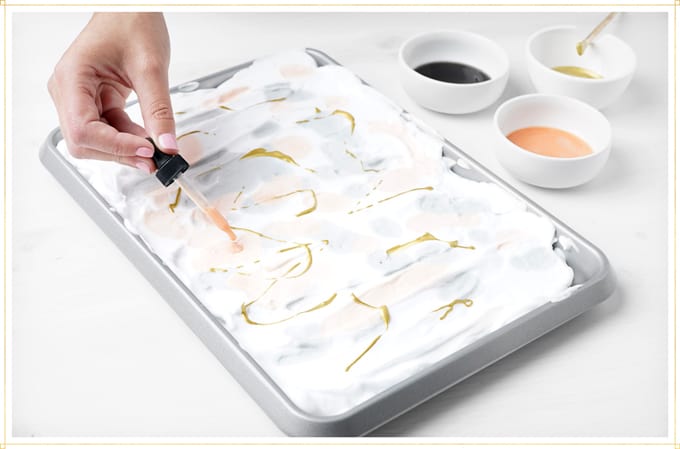
Step 3: Add in two to three colors with a dropper.
Choose three or four colors that you want to marble your paper with. If you want a base color, begin by making the shaving cream that color. Add in a few drops of the other colors you’d like to use.
You can always use more colors, but be cautious about using more than four, since that might turn the shaving cream brown.
Step 4: Swirl the colors in a figure eight pattern.
Take the end of the paint brush or a toothpick and run it through the colors in the shaving cream to create a swirled pattern.
To create this pattern, draw figure eights in the cream. Be careful not to mix it too much or else it will lose its marbled appearance.
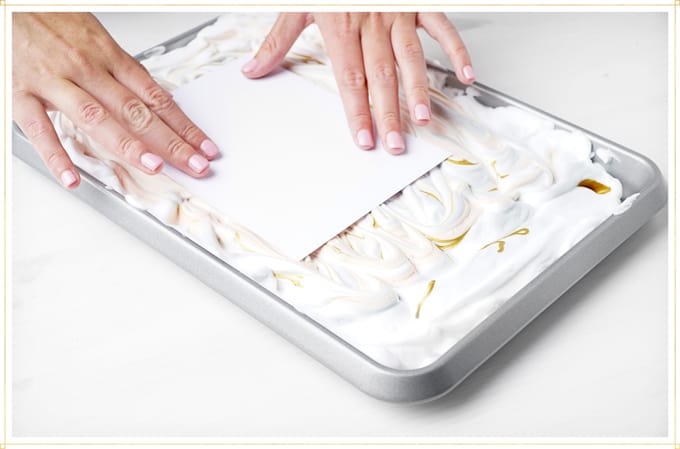
Step 5: Lightly press the cardstock into the shaving cream.
Gently press your paper into the tray of colored shaving cream so that its whole surface comes in contact with the paint.
Once it’s covered, remove the paper from the tray. Don’t let it sit for more than a minute, or else your paper will get too wet and and the pattern won’t appear.
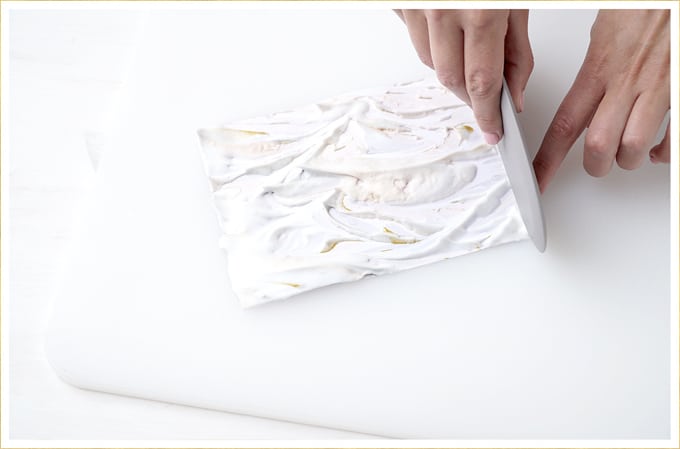
Step 6: Remove and scrape off the extra shaving cream.
Immediately after removing the paper, use a paint scraper, piece of cardboard, ruler or any straight edge to wipe off the remaining shaving cream.
Step 7: Let the paper dry and enjoy!
Set your marbled paper aside to dry for about an hour. Placing it on a cookie cooling sheet will keep it from sticking to any surfaces or getting damaged.

Thanks for reading all about our Marble Paper DIY {How to Make Your Own Marbled Paper with Shaving Cream!}. Have a lovely day!