Looking for a quick and easy craft for Christmas presents this year? When I found some plain, wooden shapes at Joann’s the other day, I knew they’d make perfect frames…and the perfect Christmas gifts! I used scrapbook paper for mine, but leftover fabric would work as well!
Materials:
Mod Podge
wood shapes (I found mine at Joann’s)
x-acto knife
foam brush
scrapbook paper
metal clips or clothespins

Step 1: Decide on your design, and cut your scrapbook paper to cover your shape. I chose a simple design using three coordinating pieces of paper, but you could easily do stripes, squares, or anything you can come up with. Don’t worry about cutting the paper to fit your shape, that’s where the x-acto knife will come in!

Step 2: Apply a coat of Mod Podge to your shape, and adhere your pieces. The one below on the left shows the front of one of my shapes, the one on the right shows what the back looks like.

Step 3: Take your x-acto knife, and (carefully!) cut around the shapes. If you don’t have an x-acto knife, scissors should work for this step. I don’t have a picture of this step…turns out you really should use both hands when working with an x-acto knife. 🙂
Step 4: Apply 2-3 coats of Mod Podge to seal, allowing your frames to dry well in between coats.

Step 5: Attach your clips or clothespins with hot glue.

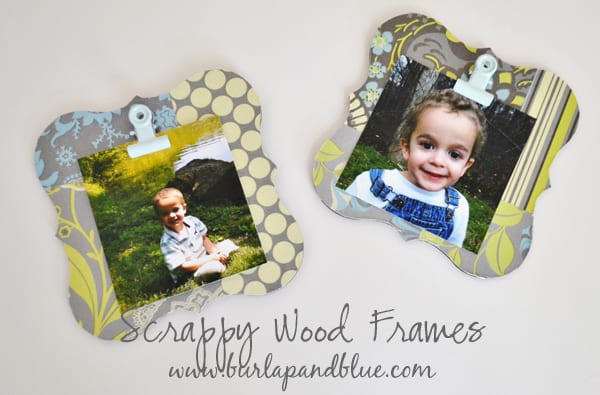
And there you have it! An easy and customizable way to display photos of your favorite people….

Have a lovely day!
Arun
Tuesday 24th of December 2013
Seems its a great project with less requirements. we can present these projects to toddler and kids. I like it so much.
Dubai Wooden Pallets