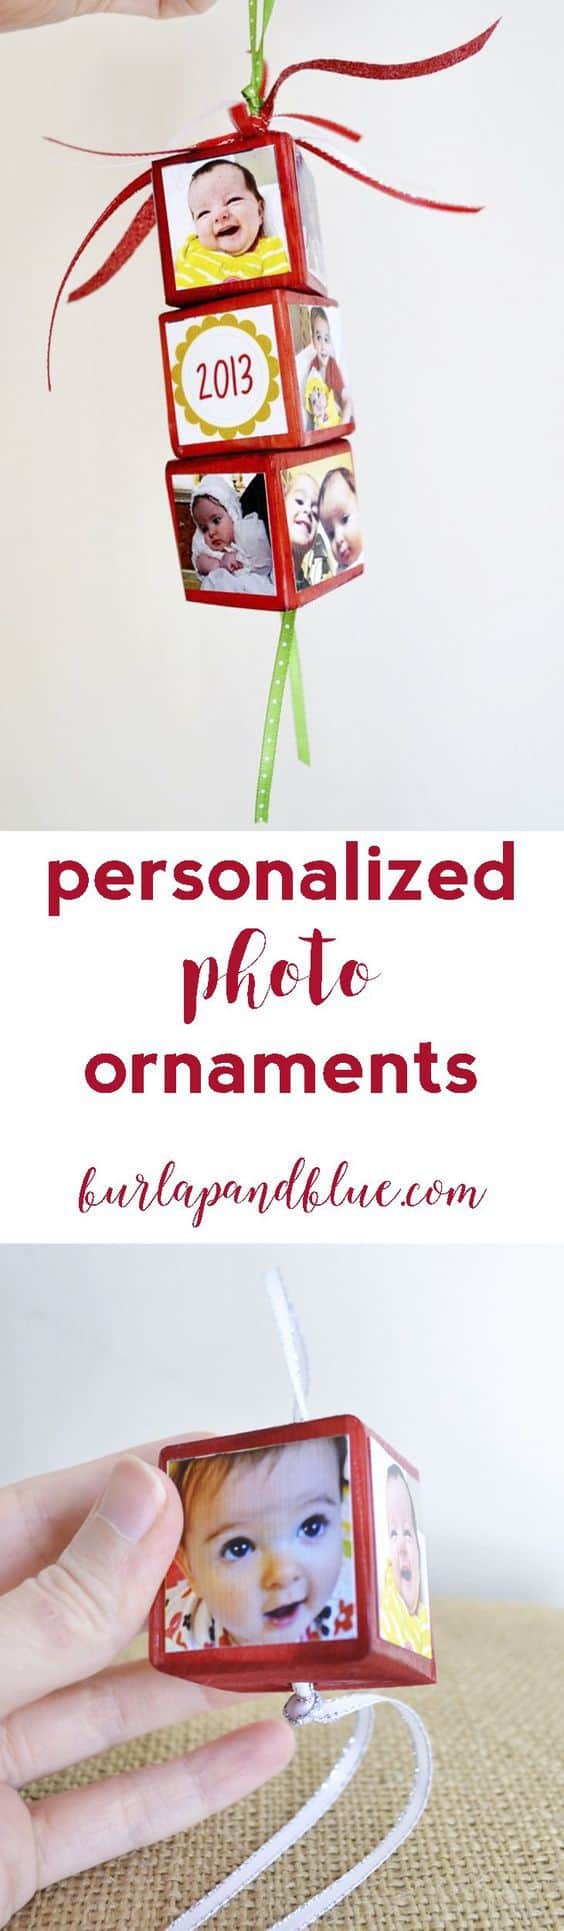
These personalized photo ornaments make a GREAT Christmas gift for grandparents and other family members.
Photo ornaments are a fun Christmas craft that are easy to customize!
Happy day-before-Thanksgiving, friends!
I have the perfect ornament tutorial to share with you all today.
It’s hard to believe Christmas is upon us, and these will make a GREAT gift for the loved ones in your life (I should know…I’ve already made four of these cuties to give away)!
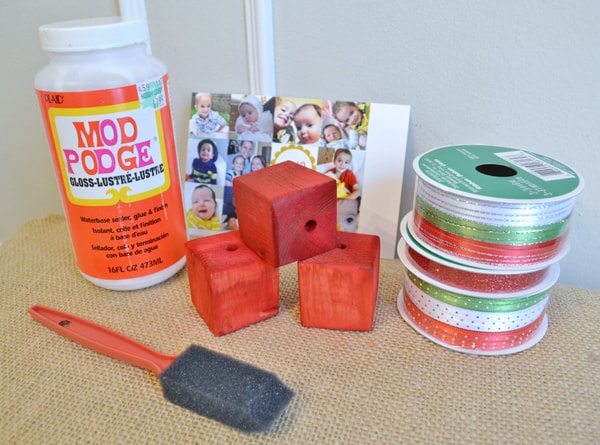
Materials:
Mod Podge
wood blocks (sanded, with a hole drilled through the center)
foam brush
square photos
ribbon
Rit dye (optional)
Step 1: First, you’ll need to resize and print out the images you want to use on your blocks.
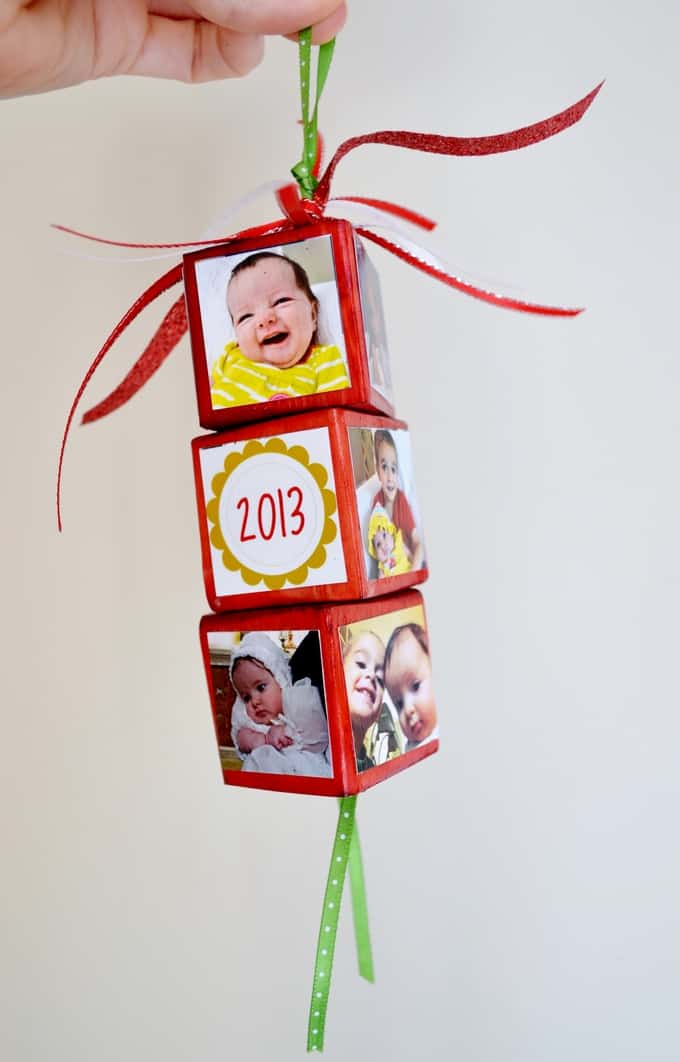
The blocks that I used are 1.5″ cube, so I shrunk my photos down to 1.25″. I used four photos per block, and used three blocks per ornament for a total of 12 pictures per ornament.
Don’t forget to also create a square for the date! If you’re unable to make the blocks yourself, you can easily find them online (here’s a link to some I found on Amazon).
FYI-I used Photoshop Elements to resize my images, but any photo editor should work.
Step 2: If desired, use Rit dye to dye your blocks. Here’s a tutorial I did last year on dyeing clothespins-just use the same technique for dyeing your blocks. Step 3: Using scissors, cut our your images, and Mod Podge them onto the four sides of your blocks.
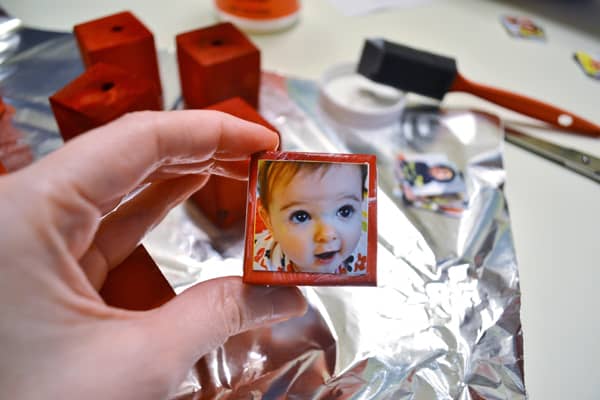
Step 4: Let dry. Apply 3 coats of Mod Podge to seal, allowing your blocks to dry well in between coats.
Almost done! Now we’re ready to add the ribbon.
I used a length of ribbon that was 25″ long, you may need a different length depending on the size of your blocks.
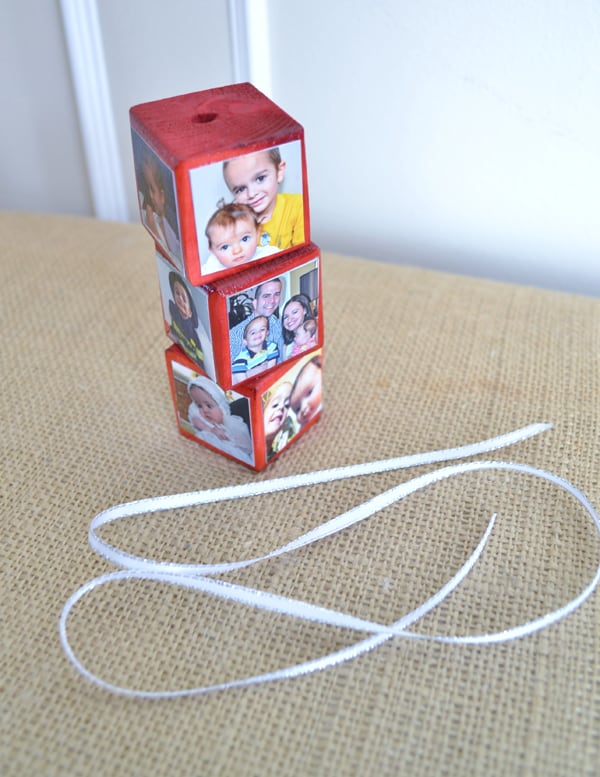
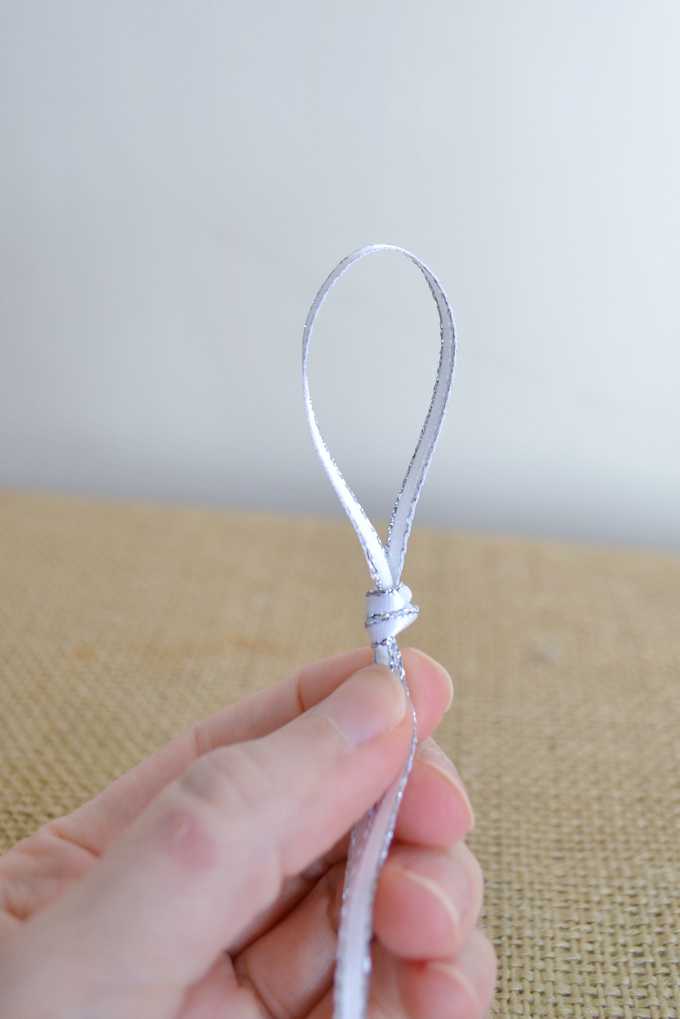
Step 5: Fold your ribbon in half, and tie a knot at the top of your ribbon. This is how your ornament will hang from your tree (or wherever your recipient decides to display it).
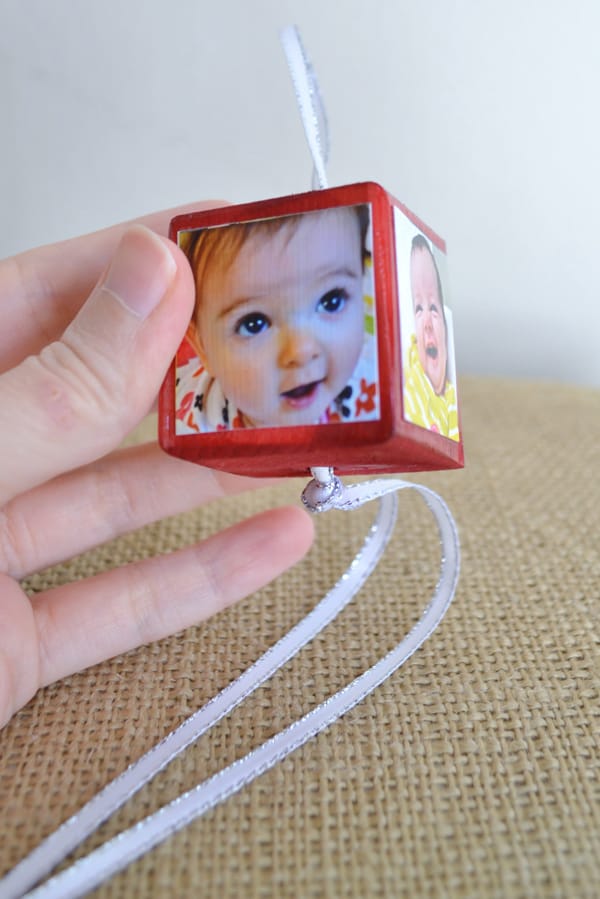
Step 6: Take the loose ends of your ribbon, and string all three blocks onto it. You can tie a knot between each block (like the photo below), or skip it. I think it looks fine either way! Once done, tie a knot at the bottom of the ribbon to hold the blocks on. Lastly, take lengths of ribbon and tie to the loop end of the ribbon to decorate it!
Have a wonderful Thanksgiving holiday, see you all next week!
Ashley ~ 3 Little Greenwoods
Wednesday 3rd of December 2014
Love this simple and festive ornament! Please share this project at my Show Me Saturday linky party. My readers would LOVE this!
Pinning and sharing! ~ Ashley
Farrah
Wednesday 26th of November 2014
Ahhh! These are so adorable! I kinda want to make one with all my favorite pets! <3
Joyce @ My Stay At Home Adventures
Wednesday 26th of November 2014
Oh wow. I love this. Seems simple enough for this girl to do. Thank you for sharing this.