Hello friends! I have quite the project to share with you all today. It all started when I saw this decorative ledge at Pottery Barn last week…
I had been looking for something to add a bit more character and visual interest to our dining room, and when I saw this picture, I knew I had stumbled upon just the thing!
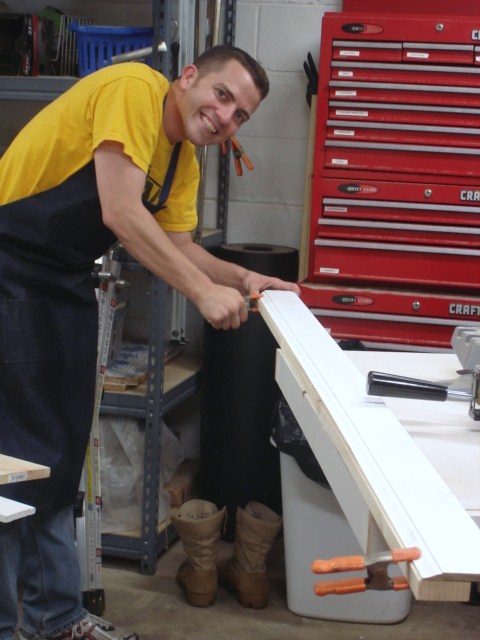
But at $350, the price tag was a bit steep for my budget. Enter a helpful husband and a trip to Lowe’s, and we were ready to begin!
The tutorial below will take you through the steps for this project, but this is definitely not a beginner’s project; the tutorial is written for someone with intermediate woodworking skills. Don’t want anyone getting in over their head on this one:) Please contact me with any questions!
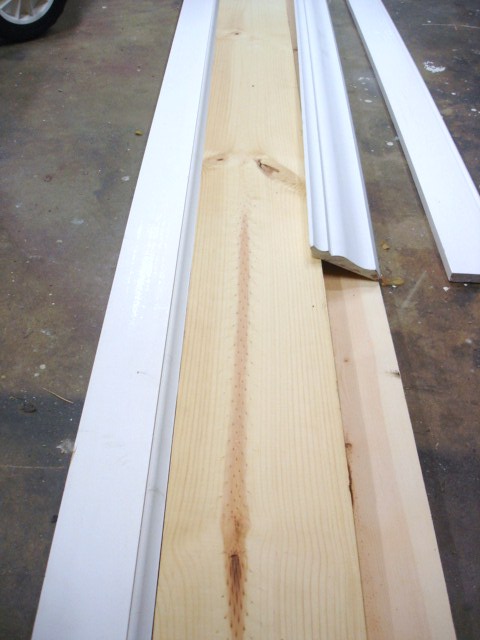
Materials Needed:
1x6x6ft. pine board
1x6x8ft. pine board
1 scalloped ogee baseboard molding 8 ft.
1 beaded baseboard molding 8 ft.
1 crown molding 8ft.
brads
screws
glue
paint
Tools Needed:
brad gun
table saw
miter box
air compressor
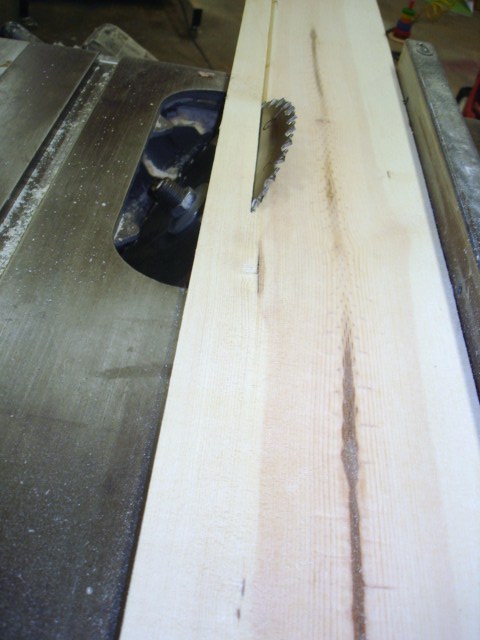
Step 1: Using your tablesaw and the 1x6x6ft. pine board, rip a strip 2″ wide from board (along grain).
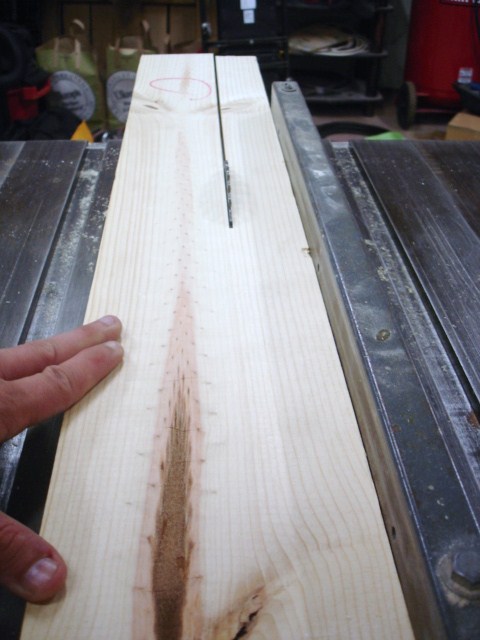
Step 2: Rip remainder into (1) 1 3/4″ piece. Set aside.
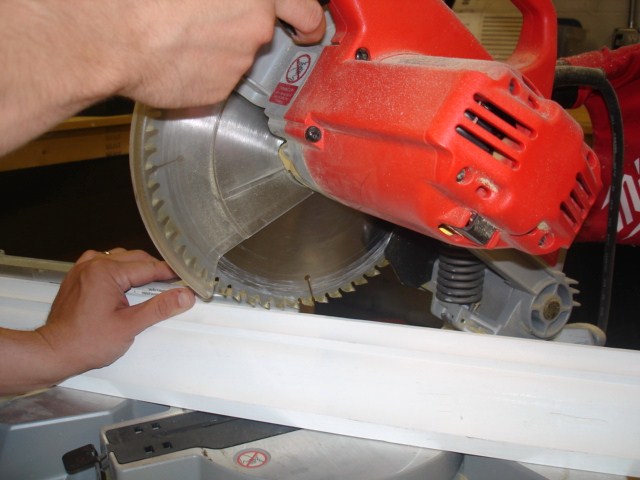
Step 3: Mitre one end of ogee baseboard molding.
Step 4: Cut ogee board to 6 ft. from inside of mitre to inside of mitre (mitre other end at this step).
Step 5: Compare ogee baseboard piece with 2″ wide piece previously cut. Make sure they are the same length.
Step 6: With glue and 1″ brads, attach two pieces together. Set aside.
Have husband smile at the camera like he enjoys spending his weekends catering to his wife’s every home improvement whim.
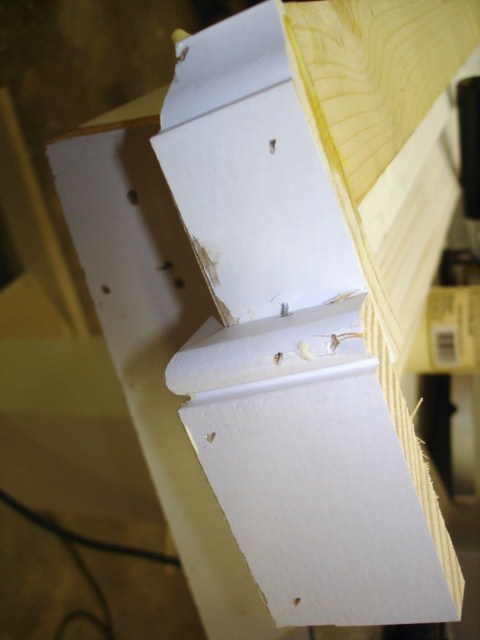
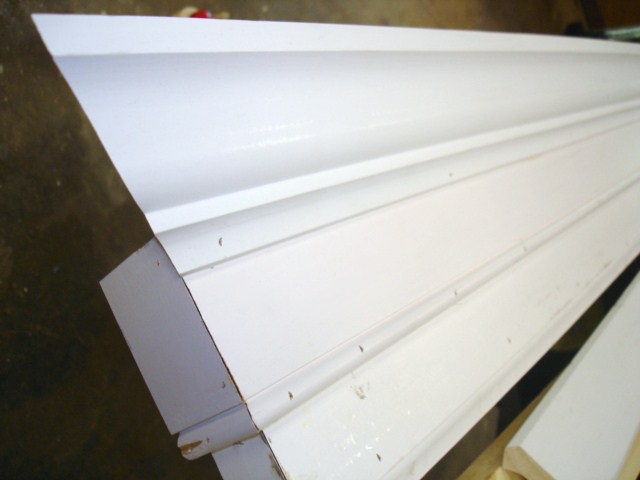
Step 7: Use remainder of ogee board to cut into two pieces to cap each end of shelf. Glue and brad to attach to shelf.

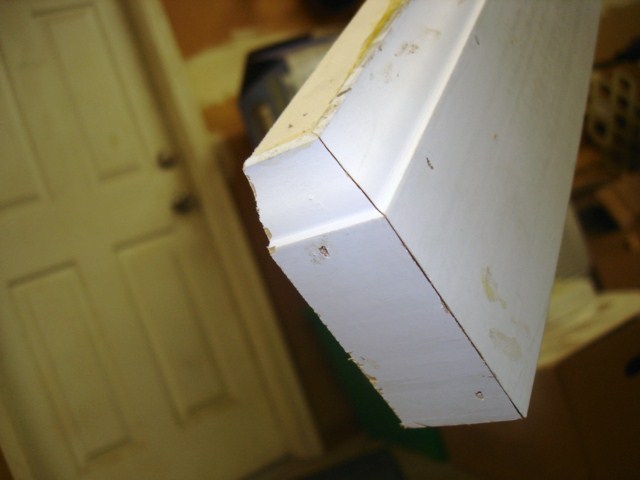
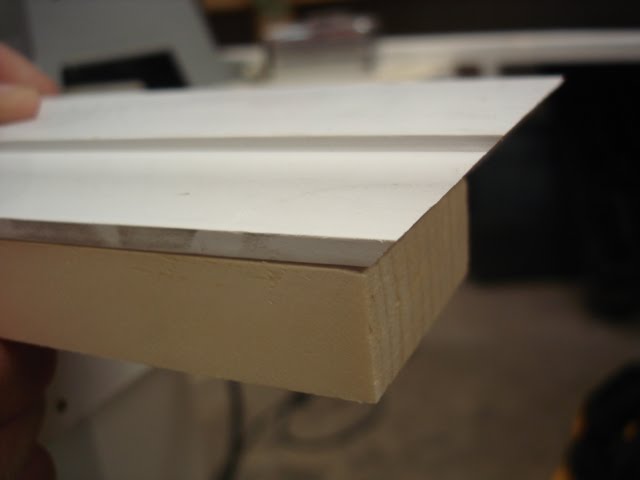
Step 8: Make a mark 3/4″ from unscalloped edge on assembled piece. This marks the lower edge of the next board to be attached.
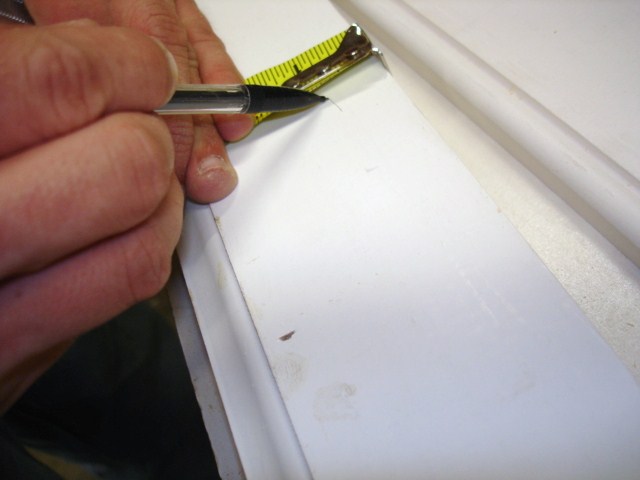
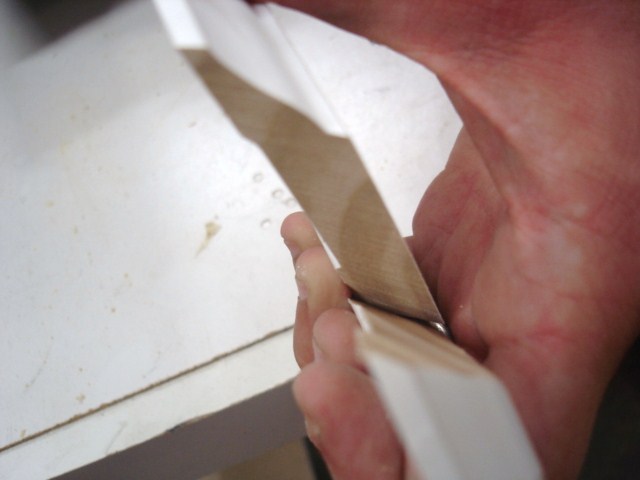
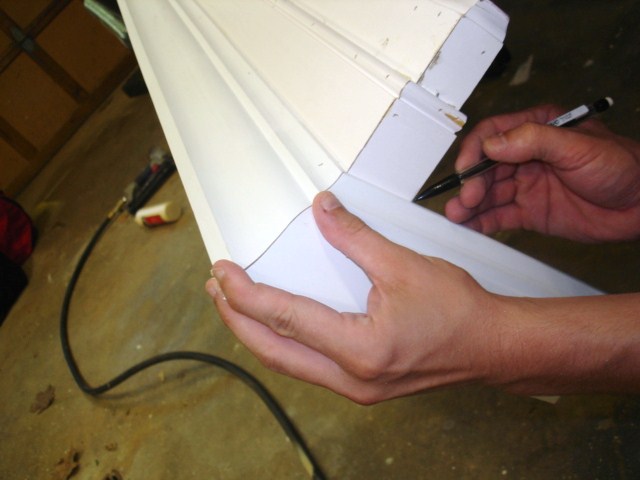
Step 9: Repeat previous steps for beaded baseboard piece using the face length of the ogee baseboard for the inside of the beaded baseboard (see pic below).
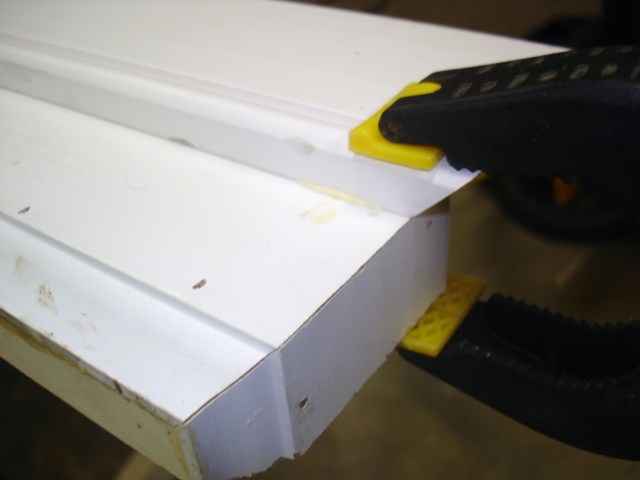
Step 10: Glue and brad to board using 3/4″ to overlap. Cap each end.
Step 11: Mark 3/4″ on beaded baseboard as done in Step 8. Repeat steps with crown molding. Be sure to use a compound angle for crown cuts.
Step 12: Using the tablesaw, rip a 35 degree angle onto the long edge of the 1x6x8ft. pine board. Cut matching ends on board to meet length of top of shelf (this will be the top of the shelf and will set into the angle on the back of the crown molding).
Step 13: Rip a straight edge on the opposite long side to match width of the inside of the crown molding.
Step 14: Glue and brad to assembled shelf.
Step 15: Paint, hang, adorn and admire!!
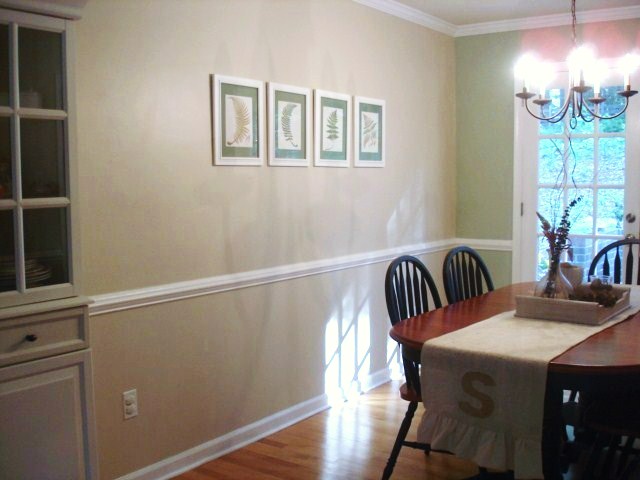
Dining room wall before…
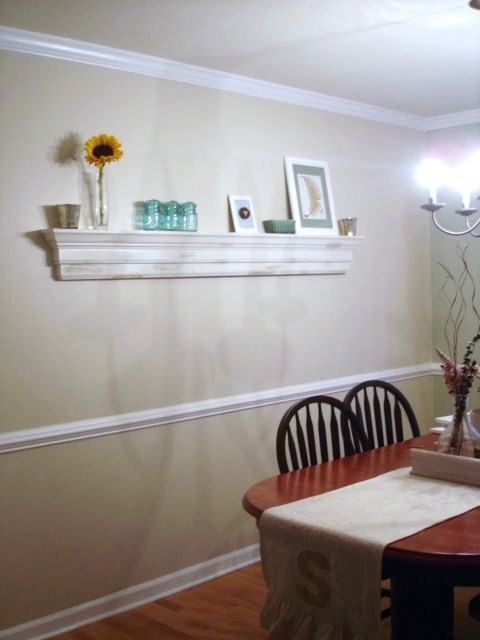
Dining room wall after…

Yanet @ 3 Sun Kissed Boys
Thursday 1st of July 2010
Looks great! I like the length of it much better than PB's. Thanks for sharing.
MessyMissy
Friday 25th of June 2010
It came out so lovely!! Great job!!
Lisa at Paint in my Hair
Friday 25th of June 2010
beautiful!
Anonymous
Friday 25th of June 2010
I like yours better that PB's...
Melissa
Friday 25th of June 2010
That is amazing. I wish that I could think of stuff like that. I never know where to start.