This shop has been compensated by Collective Bias, Inc. and its advertiser. All opinions are mine alone. #PoweredByRayovac #SureThing #CollectiveBias
I love discovering and creating unique, outside-the-box activities that the whole family can enjoy. This kids flashlight craft is fun, easy, and can entertain kids for hours. What kid, after all, doesn’t love playing with flashlights?
Want to create your own flashlight silhouettes? Here’s what you need…
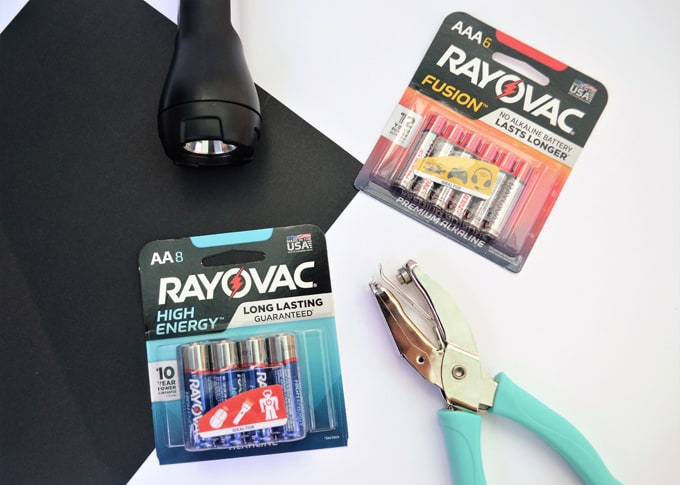
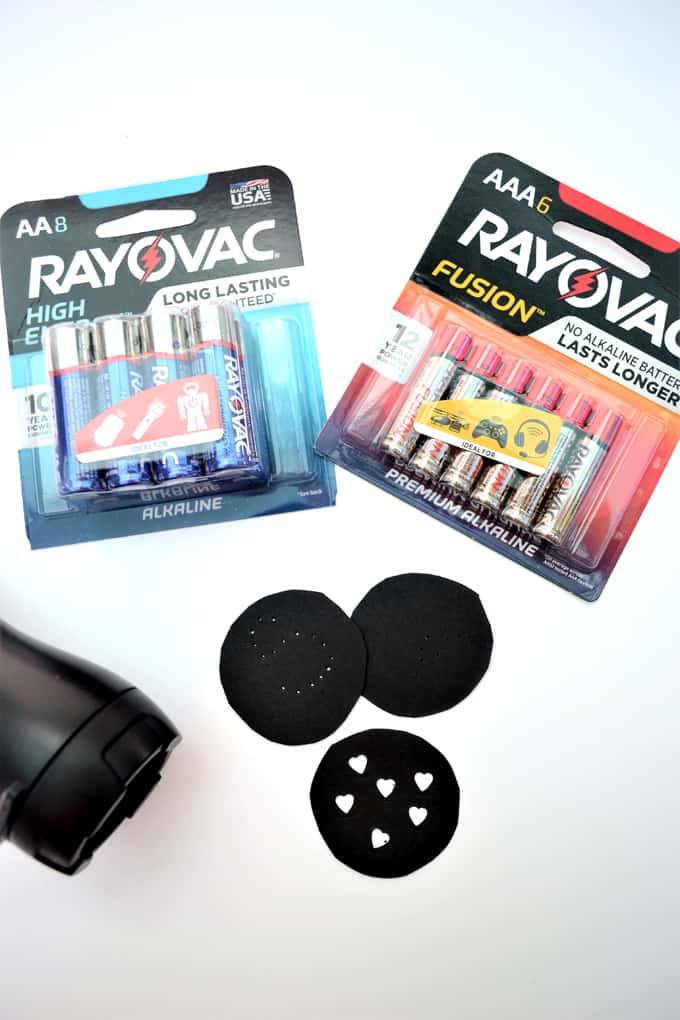
Materials:
- Flashlights
- RAYOVAC® Batteries (find a Smartsource coupon here )
- Black Paper
- Black Spray Paint
- Pin or Small Punch for Creating Shapes
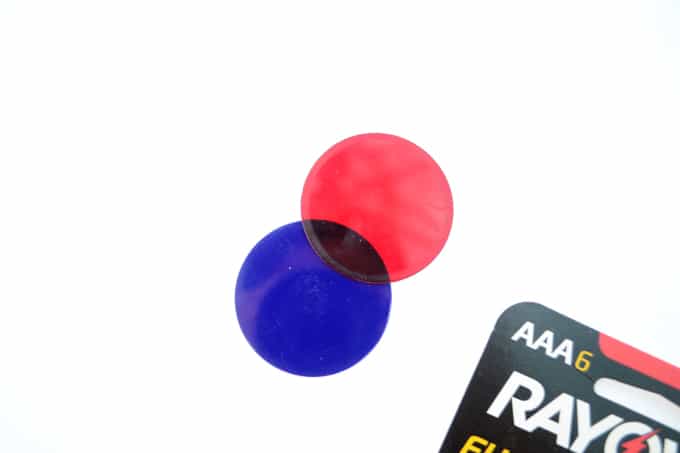
Want to add an extra dose of fun to your flashlight silhouettes? Look for a flashlight with different colored lenses. You can change out the colors for several different effects! Also note, the flashlight should be a single-bulb flashlight; multiple bulbs will distort the image you create.
Step 1: Open your flashlight, remove the cone piece, and paint it black. You can use spray paint or craft paint for this. If you are using a nicer flashlight, or, for whatever reason, don’t want to permanently alter it, you can cover the inside of the cone with black washi tape instead!
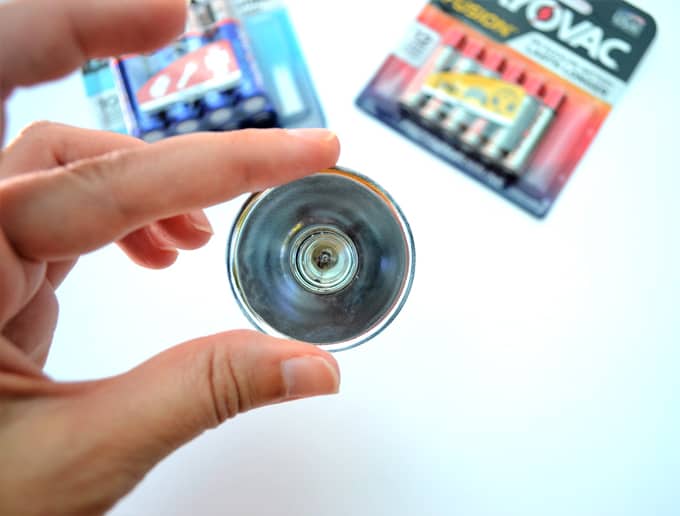
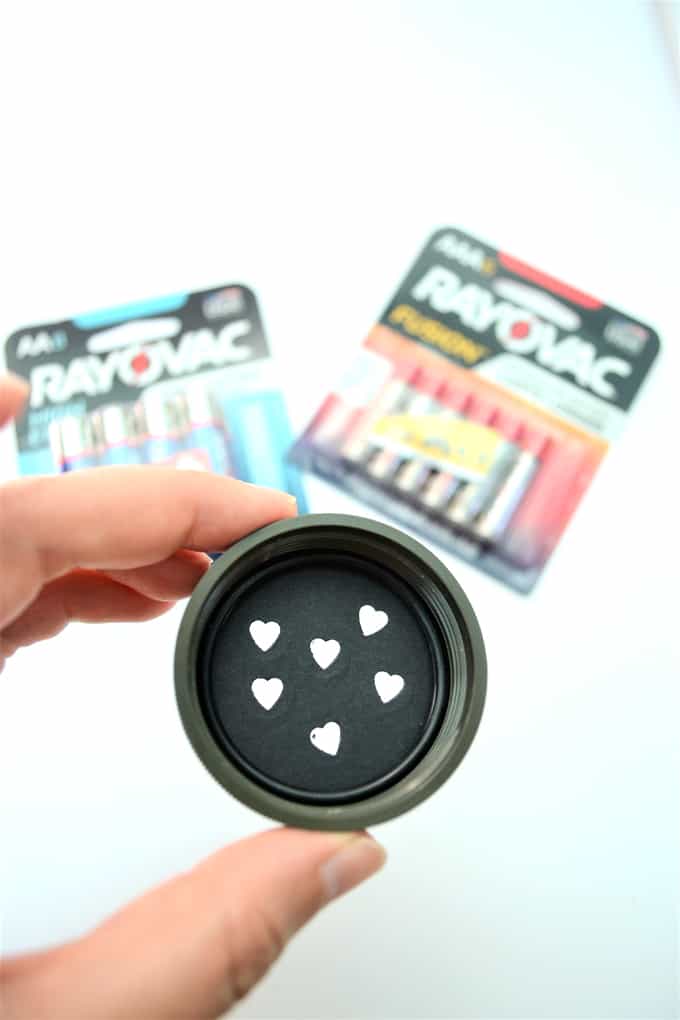
Step 2: Remove the plastic lens from the flashlight and use this to trace circles out of black cardstock.

Step 3: Using small craft punches (the smaller the better!), decorate your pieces of cardstock. You can even use a pushpin to create shapes and designs (just place foam underneath your cardstock so you can easily punch through without damaging your furniture).
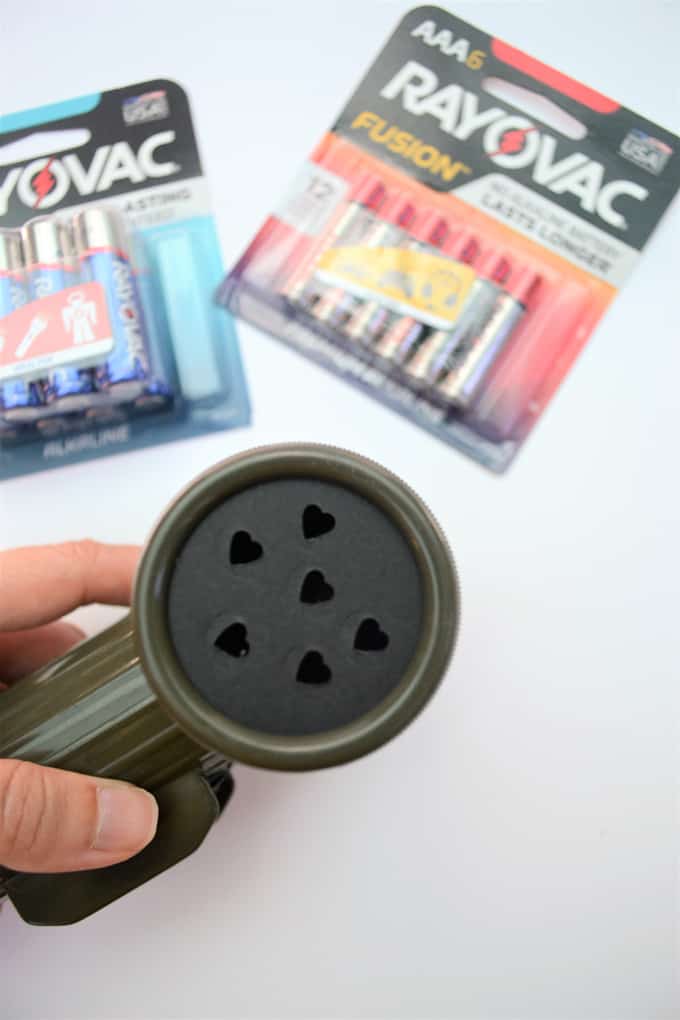
Step 4: Put your flashlight back together, inserting the cardstock at the front of your flashlight, in front of the lens.
Step 5: Most importantly, ensure hours of flashlight fun by using RAYOVAC® Batteries. RAYOVAC® Batteries last just as long as competitors, but cost less! I purchased RAYOVAC® HIGH ENERGY™, perfect for making sure you get the longest battery life possible in high-use products**, and RAYOVAC® FUSION™, ideal for your most power-hungry devices (remote-controlled vehicles, I’m looking at you!)
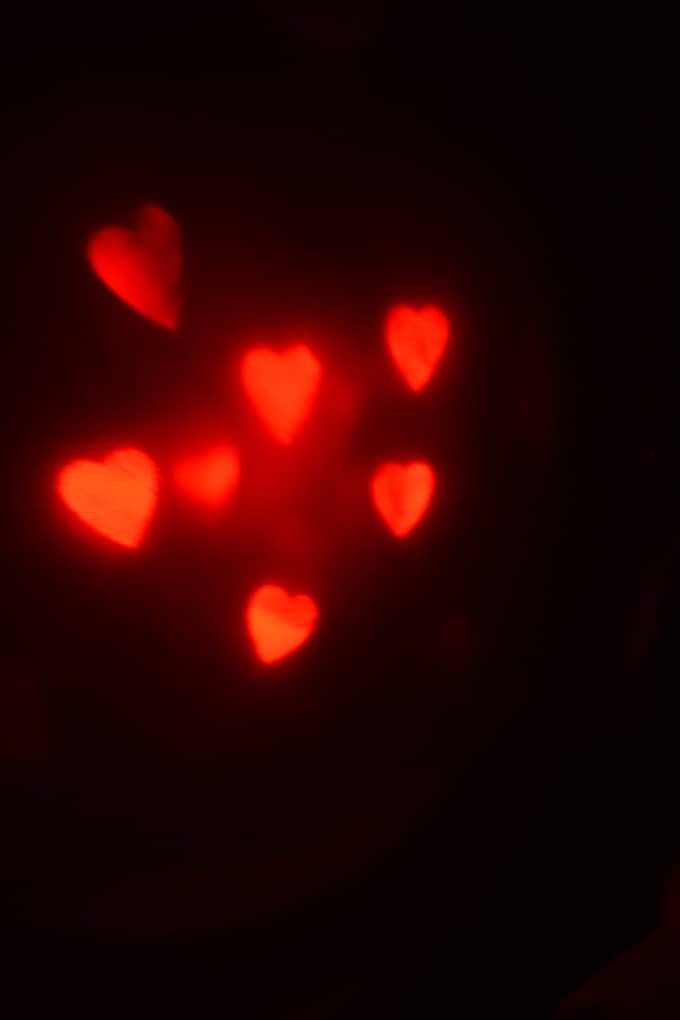
Step 6: Find a darkened room, or wait until sunset, and let the fun begin!
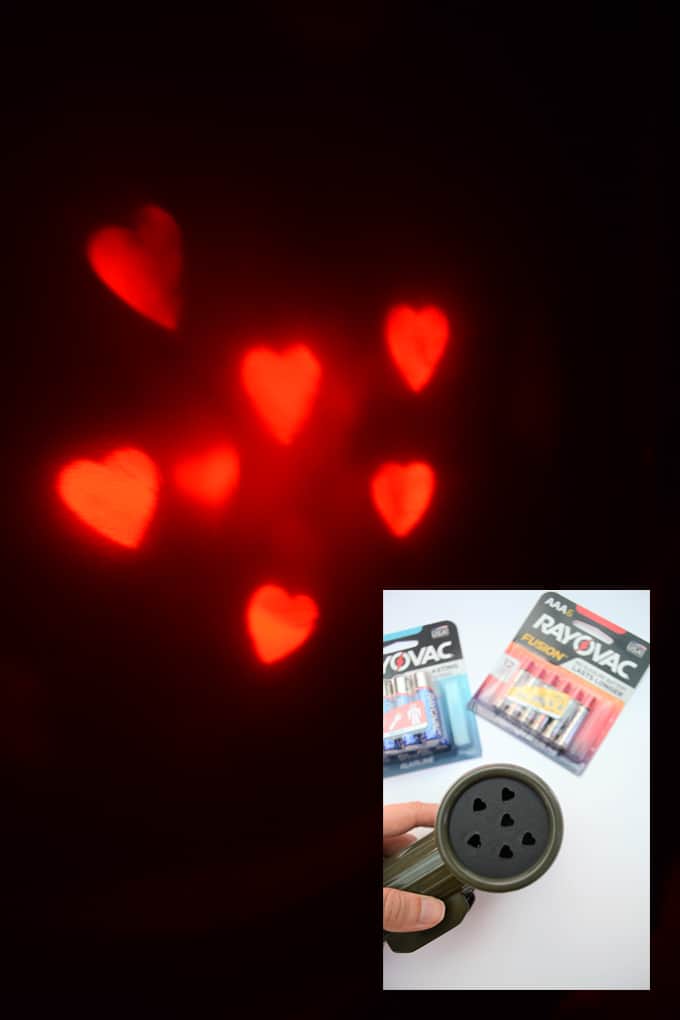
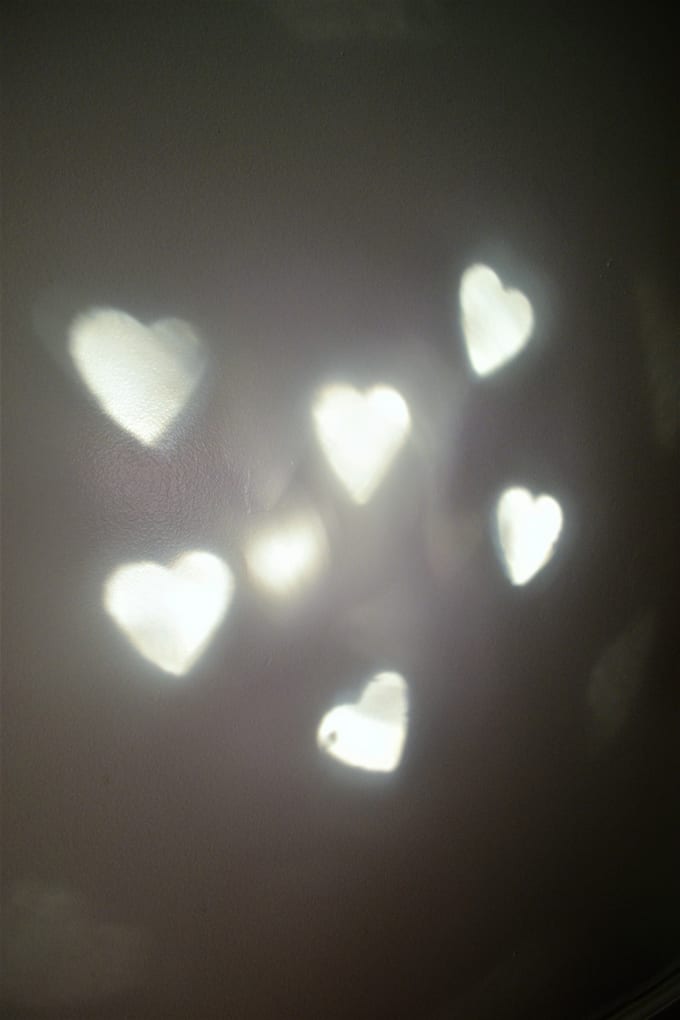
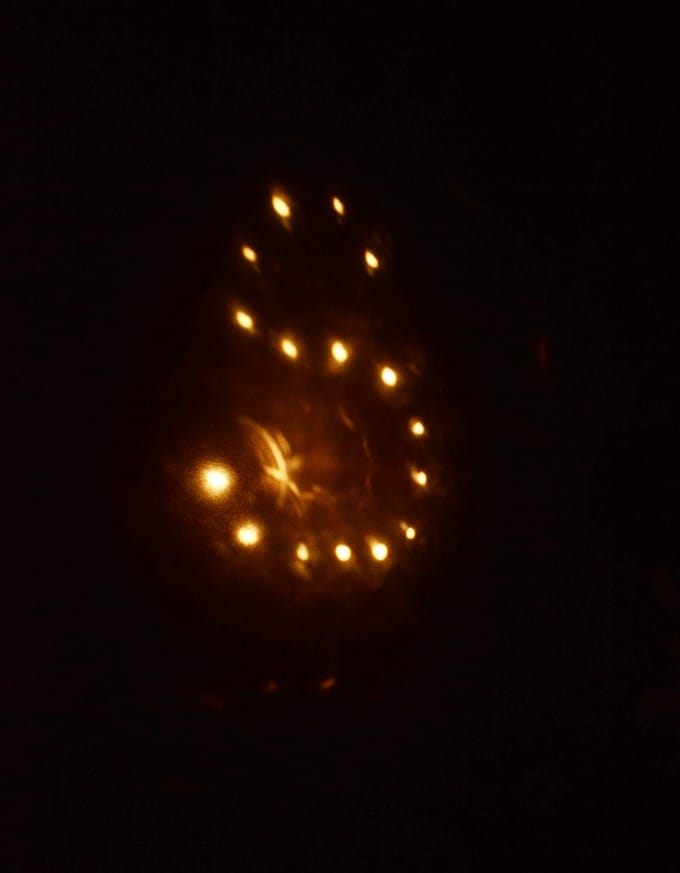
Below are two images where I used a heart punch on my cardstock…one with the red lens, one with clear. And below that, my son used a pushpin to create the letter “S”!
As you may imagine, the farther back you get from the wall (or wherever your image is projected), the less clear your image will be. But even if your image isn’t super distinct, this is definitely an activity your kids will want to do again and again.
Long-lasting batteries at a lower price? Sign me up! Non-working toys, remotes, etc are a thing of the past in our household. I found my RAYOVAC® batteries at Walmart, check out their battery displays near the registers!
Thanks for reading all about my Kids Flashlight Craft-Make DIY Flashlight Silhouettes {a Tutorial}! Have a fantastic day!

Looking for another easy kids craft? These rock painting ideas for kids are the perfect rainy day activity! And our family favorite slime recipe only needs a few ingredients and will entertain your kids for hours.
**Money Back Guarantee: Contact 1-800-891-6091 or www.RAYOVAC.com/MBG for more details. Restrictions apply.
4 Household Items That Make Great Toddler Activities
Wednesday 14th of February 2018
[…] some great silhouette puppets with popsicle sticks and black construction paper. Get the tutorial HERE. Or brush up on your finger puppet skills […]
Amy Anderson
Wednesday 27th of September 2017
This is such a fun idea. My niece would love it!!
Leanne Jacobs
Friday 22nd of September 2017
How cute is that! My kids would have so much fun with this idea.